Easter Cheese Babka

Featured in Sweet Creations and Baking Adventures.

This Easter Cheese Babka is a delightful take on classic sweet bread, ideal for spring gatherings. The silky brioche provides a soft, buttery texture, paired with a colorfully swirled cheese filling. Dividing the filling into four light pastel shades transforms the loaf into both a treat for the eyes and a crowd-pleasing dessert. Though it takes a few hours to prepare, the rising times are hands-off, ensuring it's approachable even for beginners. The final touch of sugar syrup keeps the bread fresh and gives it a polished finish. Two loaves are made at once, perfect for sharing or saving for later.
Rana
Updated on Fri, 04 Apr 2025 13:35:02 GMT
Easter Cheese Babka Pin it
Easter Cheese Babka | flavorsenthusiasts.com

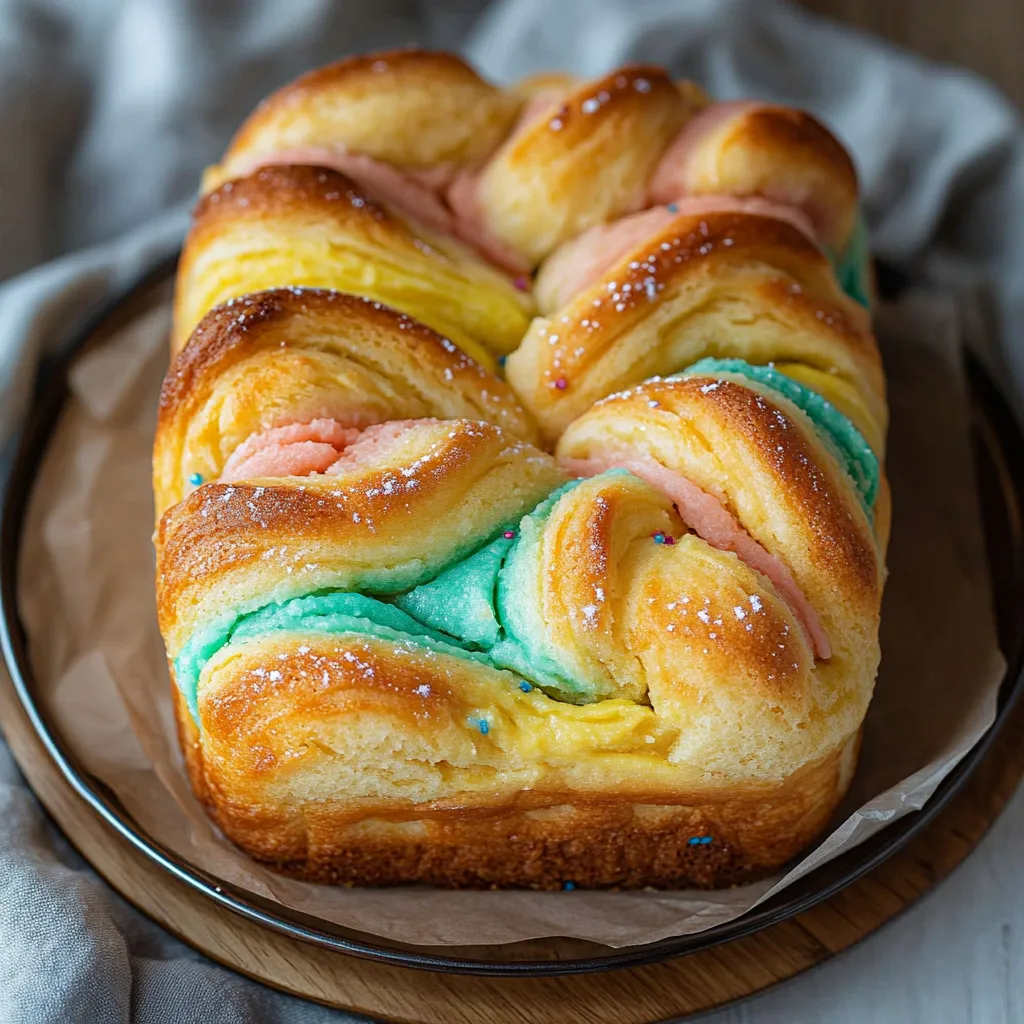
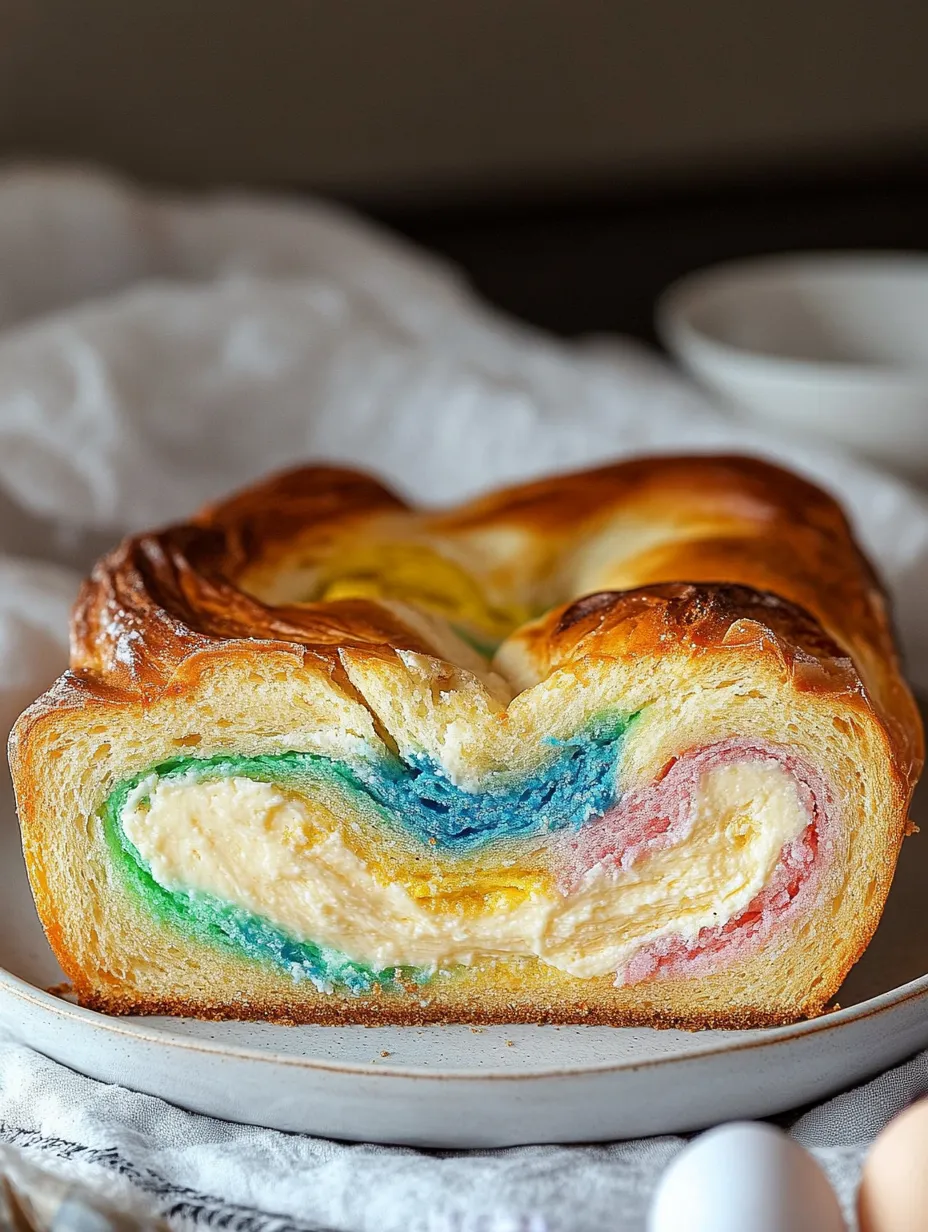
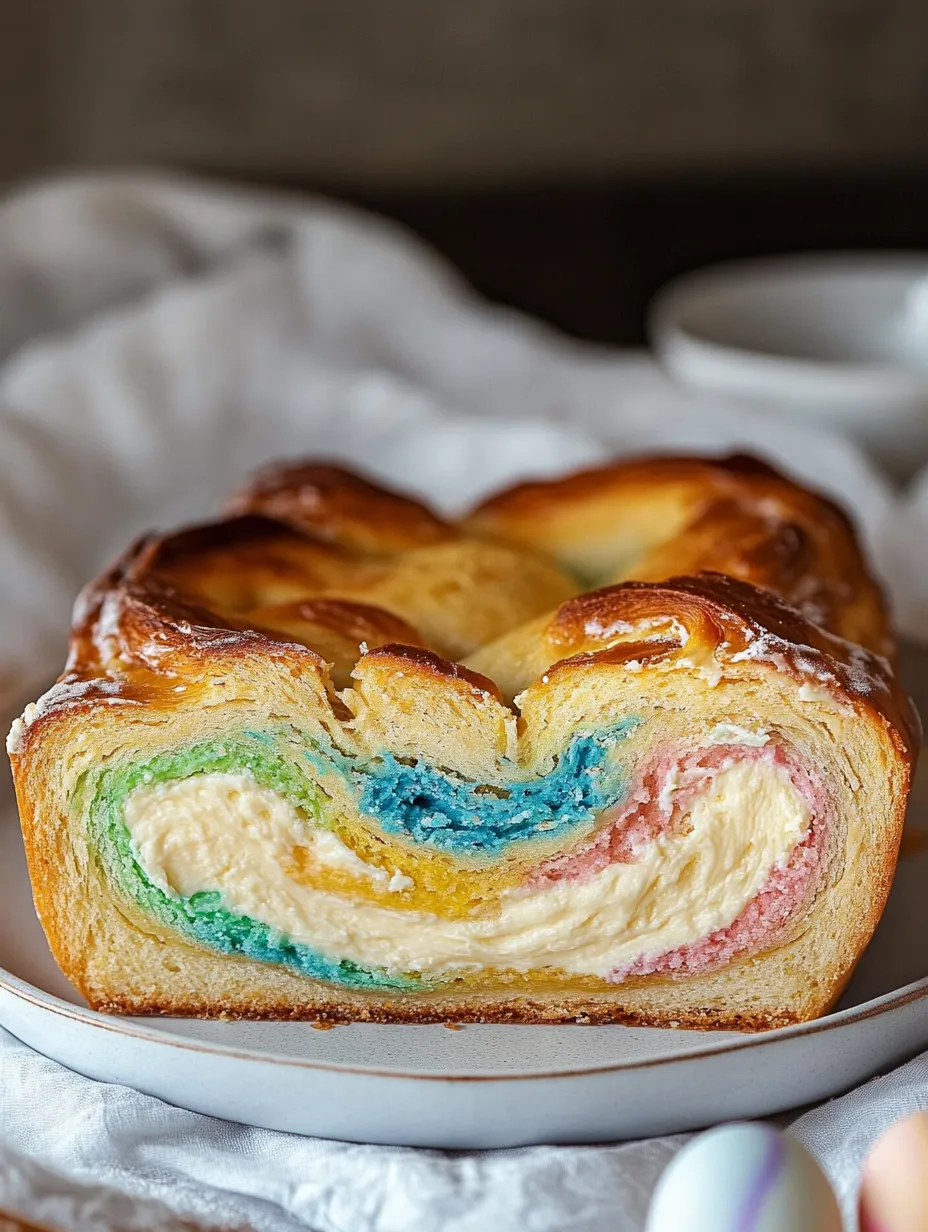
A festive Easter babka with cream cheese blends buttery brioche-like dough with swirls of colorful cream cheese throughout. This holiday bread delivers a soft, yeast-based texture wrapped around vibrant pastel cream cheese filling, forming gorgeous spirals when cut. A sweet sugar glaze tops it off, adding moisture and giving the outer layer a beautiful glow.

The first slice of this babka at our family gathering brought everyone running to the table. As I cut through to reveal those swirly pastel patterns, everyone went from excited gasps to complete quiet as they enjoyed each buttery, cream cheese-loaded bite.

Picking Perfect Filling Components

  • Cream cheese: Pick full-fat versions for maximum creaminess and flavor; let it sit out completely until soft to prevent any chunks
  • Granulated sugar: Adds just enough sweetness while keeping the filling perfectly smooth
  • Vanilla extract: Brings warmth and extra flavor depth; go for real extract instead of artificial for better taste
  • Food coloring: Gel types work best for bright colors without making the filling runny; start small for gentle pastel tones

In my kitchen, I always grab Philadelphia cream cheese for this babka. It's got just the right tang and smoothness. Don't rush the softening part—I always pull mine out at least 60 minutes ahead so it mixes up without a single lump.

Crafting Your Twisted Delight

Mix the lukewarm milk with yeast and a tiny bit of sugar in a bowl. Wait until it bubbles up nicely, about 5-10 minutes. This waiting step makes sure your dough will puff up properly and turn out light.

Blend The Base

Put flour, the rest of your sugar, and salt in a big bowl. Pour in your bubbly yeast mix plus eggs and vanilla. Stir until everything looks roughly combined, then work in very soft butter bits until they completely disappear into the dough.

Let It Grow

Move your dough to a bowl with a light oil coating, cover with plastic, and find a cozy warm spot for it. Give the dough time to double up, which usually takes between 1-2 hours based on how warm your kitchen is.

Easter Cream Cheese Babka Pin it
Easter Cream Cheese Babka | flavorsenthusiasts.com

Whip Up The Filling

While you wait for the dough, beat room-temp cream cheese with sugar and vanilla until it looks perfectly smooth. Split this mix into four little bowls and add a touch of gel coloring to each one, making lovely soft pastel colors.

Form Your Loaf

Flatten half your dough into a rectangle, mark some lines across it, and spread different colored cream cheese between those marks. Roll it up from the long side, cut it down the middle, and twist the two pieces around each other to make that classic babka look.

When I make babka, I think of my grandma every time. She always handled the dough so gently and told me the twisting part was when you poured your heart into the bread. I carry on that little tradition whenever I bake this special treat.

Ways To Enjoy It

This cream cheese Easter babka goes great with your morning coffee or afternoon tea break. Cut thick slices and eat them slightly warm to enjoy that buttery goodness. For a fancy brunch, serve it with fresh fruit and some yogurt parfaits. Got leftovers? Turn babka slices into amazing French toast by dunking them in vanilla egg mix and frying until they turn golden.

Seasonal Twists

Switch up this babka for other holidays by changing colors. Try red and green at Christmas, orange and black for Halloween, or pick your family's favorite colors for birthday celebrations. Want different flavors? Add some lemon zest to brighten the cream cheese, or mix in tiny chocolate chips for a cheese-chocolate combo. If you don't like things too sweet, cut back on sugar and add a tiny pinch of salt to make the cream cheese taste pop.

Easy Easter Cream Cheese Babka Pin it
Easy Easter Cream Cheese Babka | flavorsenthusiasts.com

Storage Smarts

Keep your babka in a sealed container at room temp for up to two days. Need it to last longer? Pop it in the fridge for about a week, though it tastes best in the first four days. Want that fresh-baked feel? Warm single slices quickly in the microwave or toaster oven before eating. Freezing works great too—wrap the cooled babka tightly in plastic and foil before putting it in a freezer bag. Let it thaw in the fridge overnight when you're ready to eat it.

After making tons of these, I've found that taking your time really matters with babka. If you rush the rising or cooling, those beautiful swirls won't turn out right. Go slow with each part of the process, and you'll end up with something so good your family will ask for it year after year.

Frequently Asked Questions

→ Can I make this dessert ahead?
Absolutely! You can prep the dough, let it rise once, and store it in the fridge overnight to continue the next day. Another option is to bake the loaf completely, cool, and keep it in the fridge for up to 5 days. Freezing also works for 1-2 months.
→ What if I’m missing some food coloring?
No problem! Use fewer colors or even try leaving part of the cheese filling uncolored for a unique look. One color works just as well.
→ Can I swap out almond extract?
Of course! Almond isn’t essential—try using more vanilla extract, citrus flavors like lemon or orange, or even cinnamon for a warm touch.
→ Why is my bread sinking after baking?
This happens if the inside isn’t baked fully or it’s moved from the pan too fast. Make sure it’s done by checking for a clean tester or temperature of 185-190°F. Let the loaf rest in the pan for a few minutes before cooling outside.
→ Do I need a stand mixer to make this?
It’s helpful but not mandatory. You can knead by hand, though it will take 10-15 minutes of effort. The dough can get sticky—avoid adding too much flour to keep it soft!

Easter Cheese Babka

A vibrant Easter treat with fluffy brioche dough wrapped around pastel-hued swirls of sweet cream cheese. Twisted into a loaf and glazed with a sweet syrup for a shiny finish.

Prep Time
35 Minutes
Cook Time
45 Minutes
Total Time
80 Minutes
By: Rana

Category: Desserts & Pastry

Difficulty: Difficult

Cuisine: Eastern European

Yield: 24 Servings (2 loaves (each loaf gives 12 slices))

Dietary: Vegetarian

Ingredients

→ Cheesecake Filling

01 12 oz softened cream cheese
02 1 teaspoon almond essence
03 ¾ cup granulated sugar
04 1 teaspoon vanilla essence
05 Food coloring in four colors of your choice

→ Sweet Dough

06 4 cups plain flour
07 1 cup warmed milk (about 100-110°F)
08 10 tablespoon mild, cubed butter
09 ⅓ cup sugar and one 1 teaspoon sugar, separated
10 2 whole eggs
11 1 teaspoon sea salt
12 A packet of active dry yeast (roughly 2 ¼ teaspoons)
13 1 teaspoon vanilla

→ Syrup Topping

14 ¼ cup water
15 ¼ cup sugar

Instructions

Step 01

Using a hand mixer, whip cream cheese, sugar, and extracts together in a bowl until it’s smooth. Put it aside for later use. Split the filling mixture into four bowls and tint each bowl with one shade of food coloring. I went with soft pastels for springtime.

Step 02

In a big bowl, stir together the flour, kosher salt, and ⅓ cup sugar. Warm the milk slightly—about 45 seconds in the microwave works until it’s 100-110°F. Combine the warm milk and a teaspoon of sugar in a stand mixer bowl (use the dough hook attachment). Sprinkle in yeast, stir gently, and leave it standing for roughly five minutes until it bubbles.

Step 03

Add the flour, eggs, remaining sugar, and vanilla into the frothy yeast mixture. Start mixing at a slow speed, and once combined, switch to low-medium speed for about five minutes till you have a nice, even consistency.

Step 04

Drop softened butter pieces (one at a time) into the dough, keeping the mixer on medium-low. Do this for about four minutes until the butter fully combines and the dough is soft but sticky. Be sure to scrape the bowl’s edges while mixing.

Step 05

Cover the mixing bowl with a plastic cover and leave it in a warm spot for 1 to 1 ½ hours, or until it’s doubled in size. You can skip this step now and instead refrigerate overnight. Once risen, press the dough down gently, move it to a clean surface, and split into two equal portions. Gently turn each half into a rectangle shape. Wrap them securely in cling film and refrigerate for half an hour to chill before rolling.

Step 06

Sprinkle some flour over your work area and roll one dough half into a 16 x 12-inch rectangle. Imagine four rows. Gently mark equal sections in the dough for these rows, but don’t slice through it. Spread different colored fillings into each row without coloring touching the edges of other rows. Leave a quarter-inch gap at one end of the rectangle.

Step 07

Starting at the edge without the border, roll the dough tightly. Trim a bit off the ends if they seem uneven. Take a sharp knife and slice the length of the rolled dough to expose the layers. Place one strip over the other and twist them together down the length, pinching the ends lightly to seal it off. Repeat this braiding with the second dough half.

Step 08

Grease two 9 x 5 baking loaf pans and line them with parchment paper, leaving enough extra to act as handles on the long edges. Place each twisted dough carefully into the pans, tucking in any ends if needed. Cover the pans with plastic film and rise another hour in a cozy spot.

Step 09

Preheat your oven to 350°F. Pop the loaf pans in and bake for 30-40 minutes until the surface is golden and a skewer or tester comes out with no sticky dough. You can also check it’s ready by confirming with a thermometer (aim for 185-190°F). If it browns too fast, tent foil loosely over the bread. Once out of the oven, use a brush to coat the loaves with equal portions of your syrup mixture.

Step 10

Wait several minutes while the braided bread cools in their pans. Then carefully transfer to cooling racks by lifting them with the parchment paper. Allow the bread to fully cool before slicing!

Step 11

Pour the sugar and water into a small pot and gently heat until the sugar absolutely dissolves. Once done, cool it completely.

Notes

  1. Once it cools completely, wrap the loaf in foil or plastic and store it in the fridge. It stays fresh up to five days because of the cream cheese.
  2. Warm slices before eating by using a toaster or microwave.
  3. You can also freeze it. First, wrap the loaf in plastic, then foil, and pop it into a sealed bag. It’ll last up to a couple of months frozen. Let it thaw in the fridge overnight before use.
  4. Want to divide the steps across two days? Do your first rise overnight in the refrigerator. Pick up where you left off the next day!

Tools You'll Need

  • Mixer with dough hook attachment
  • Electric hand mixer
  • Two loaf tins sized 9x5 inches
  • Baking parchment paper
  • Rolling pin
  • Small cooking pot
  • Pastry coating brush
  • Food thermometer (if needed)

Allergy Information

Please check ingredients for potential allergens and consult a health professional if in doubt.
  • Has dairy (cream cheese, butter, milk)
  • Includes gluten (flour)
  • Contains eggs

Nutrition Facts (Per Serving)

It is important to consider this information as approximate and not to use it as definitive health advice.
  • Calories: 373
  • Total Fat: 18 g
  • Total Carbohydrate: 48 g
  • Protein: 7 g