
 Pin it
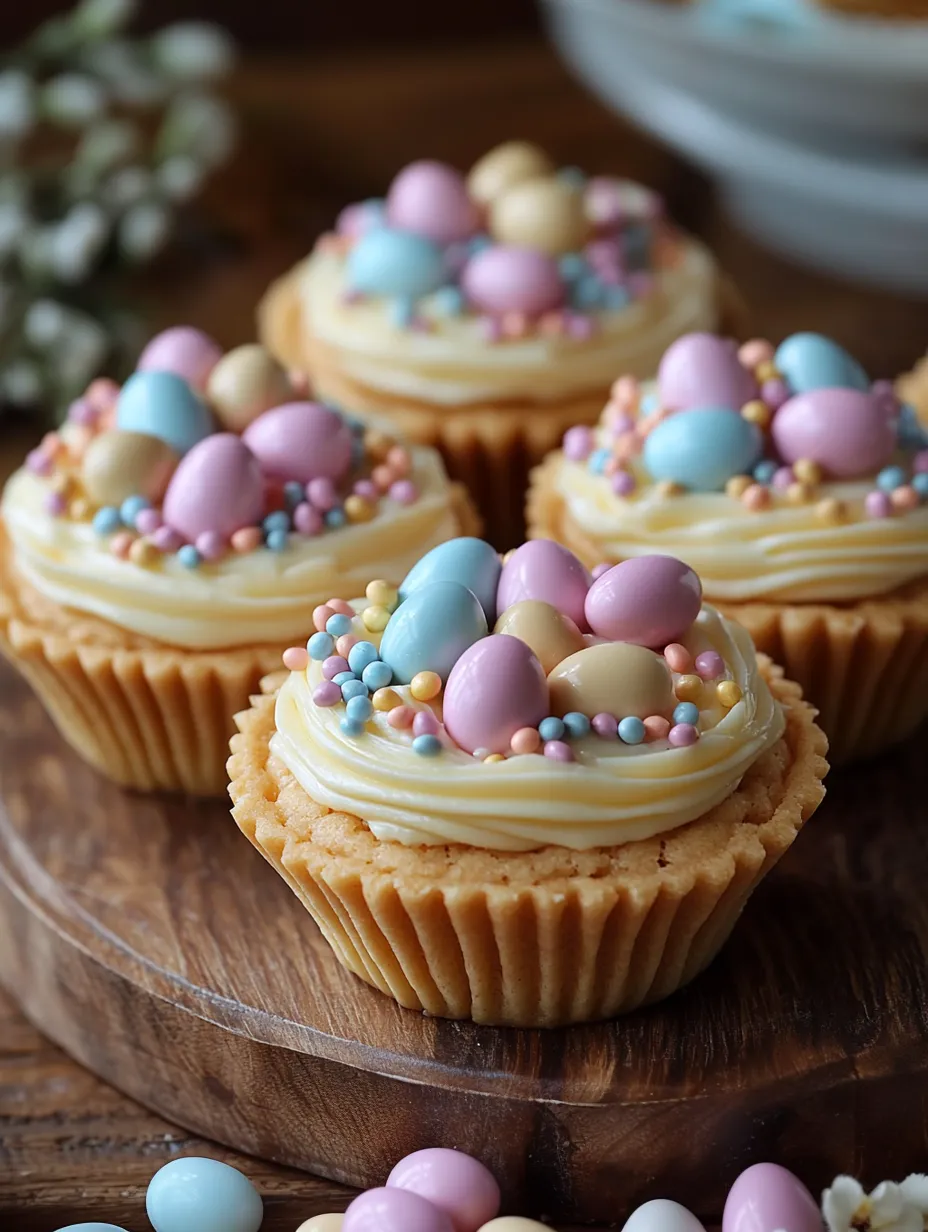
These mini Easter basket cookie cups blend buttery cookie bases with fluffy frosting and bright candies to make cute little edible baskets. You'll love how these sweet treats use soft sugar cookie "cups" filled with creamy buttercream "grass" and topped with chocolate egg candies. They're great for Easter parties, spring get-togethers, or fun kitchen time with kids - these darling desserts are just as fun to make as they are to eat.
I whipped up these cookie cups for the first time at an Easter brunch when I needed something that could work as both a pretty table setting and a tasty dessert. I couldn't help but smile when guests did a double-take realizing those cute decorations were actually meant to be eaten! This simple shortcut has now become something my family looks forward to making together every year.
Key Ingredients
- Refrigerated sugar cookie dough: Gives you perfect cup shapes without all the mixing and measuring
- Butter: Adds a creamy taste and smooth feel to your frosting
- Powdered sugar: Blends perfectly for silky frosting without any sugar grains
- Heavy whipping cream: Makes the frosting extra smooth and helps it hold its shape
- Vanilla extract: Brings a warm, sweet flavor that makes everything tastier
- Chocolate egg candies: Add Easter charm and chocolatey goodness on top
Tasty Step-by-Step
- Form Your Cookie Cups:
- Turn your oven on to 350°F (175°C) and spray a 12-cup muffin tin really well with cooking spray. Don't skimp here - good greasing means your cups won't stick later. Take one 16-ounce pack of chilled sugar cookie dough and split it into 12 equal chunks. Put one piece in each muffin cup and gently push down to make a flat bottom layer.
- Cook And Mold:
- Pop the dough into your hot oven for about 10-14 minutes, keeping an eye out for slightly golden edges. Ovens can be tricky, so start checking at 10 minutes to be safe. As soon as you pull them out, grab a shot glass or small spice jar and press down in the middle of each cookie. This makes a little dip that'll hold your frosting and candy later, creating that basket look.
- Let Them Set:
- Let your cookie cups hang out in the muffin tin for about 10 minutes. This quick rest helps them firm up just enough so they'll keep their shape but still be bendy enough to take out without breaking. After those 10 minutes, slide a butter knife around the edges to loosen them up, then carefully pop them out onto a cooling rack. Let them cool all the way before adding the frosting so it doesn't turn runny.
- Whip Up The Frosting:
- While your cookies cool down, grab a big mixing bowl and beat 1 cup (2 sticks) of room temperature salted butter until it's light and fluffy - this'll take 2-3 minutes. Slowly mix in 3 cups of powdered sugar, starting on low speed so you don't end up wearing it! Once it's mixed in, crank up to medium-high. Add 2 tablespoons of heavy cream and 1 teaspoon of vanilla, then beat for another 2 minutes till it's super fluffy.
- Build Your Baskets:
- Once your cookie cups are totally cool, put your frosting in a piping bag with a grass tip to make it look like real basket grass. If you don't have one, just use a plastic bag with the corner snipped off for a simpler look. Squeeze frosting into each cookie cup, filling up that dent you made earlier. Place a few chocolate egg candies on top of each one so they look like eggs nestled in grass. If you want, dust them lightly with extra powdered sugar for a fancy touch.
 Pin it
My grandma always told me the best Easter treats should be both fun and tasty, and these cookie cups hit the mark perfectly. The first time I tried making them, I got impatient and tried taking them out while they were still warm - big mistake! Half of them fell apart in my hands. Taking that extra time to let them cool properly made all the difference. Sometimes the simplest cooking lessons stick with you the most.
Ways To Serve
Stack them on a cake stand for a pretty Easter dessert display. Use them as place cards at your holiday table. Pair them with springy drinks like fresh lemonade or strawberry punch. Make them the star of a dessert platter with fresh berries and pastel cookies around them.
Keeping Them Fresh
Keep your finished cookie cups in a sealed container at room temp for up to 3 days. If you want to make them further ahead, store the unfrosted cups in a container for up to a week, then add frosting and candy right before serving. Don't try freezing the completed treats as the frosting texture won't be the same after thawing.
Fun Twists To Try
- Chocolate Baskets: Switch to chocolate cookie dough for a darker, richer base.
- Coconut Grass: Stir green-tinted shredded coconut into your frosting for texture and looks.
- Rainbow Filling: Split your frosting into smaller batches and color each one with different pastel shades.
- New Flavors: Try adding lemon, almond, or coconut flavor to your frosting mix.
 Pin it
Over the years, I've brought these Easter basket cookie cups to countless spring parties, family dinners, and school events. There's something magical about how they capture the fun of Easter while still being a comforting, homemade treat. Everyone loves the mix of soft cookie, smooth frosting, and crunchy candy in each bite. They've become a must-have at our Easter celebrations, and guests always ask if I'll be making them again next year.
Frequently Asked Questions
- → Can I make these with homemade dough instead of pre-made?
- Of course! Just go with a sugar cookie recipe that’s not too soft. Roll the dough into balls of about 1.5 tablespoons for similar-sized cups.
- → How do I make these look more like baskets?
- Tint the frosting green to mimic grass. Use a grass piping tip for a neat finish and consider adding licorice strips as handles to complete the look.
- → How far ahead can I prep these treats?
- You can bake the plain cookie cups 2-3 days beforehand and store at room temperature in an airtight container. Assembled cups, with frosting, are good for up to a day or refrigerated for three days max.
- → What if my cookie cups puff too much in the oven?
- After baking, gently press the centers again while they’re still warm but slightly set. Also, try making deeper indentations right after removing them from the oven.
- → What other candies can I use for toppings?
- Anything festive! Mini jelly beans, pastel M&Ms, chocolate eggs, or tiny bunnies work well. Sprinkle options like green-tinted coconut or crushed cookies can also add fun textures.