
 Pin it
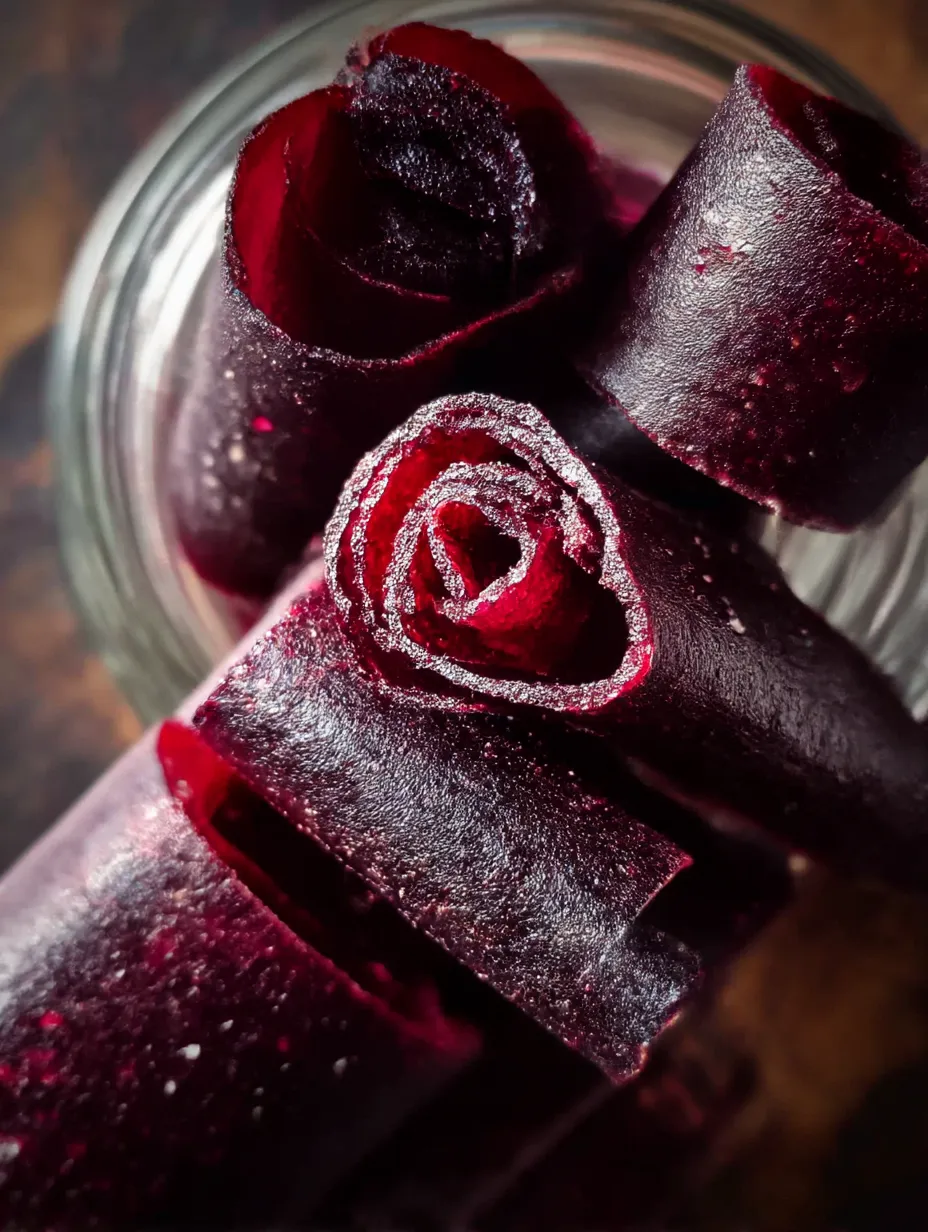
Making your own cherry fruit leather hits you with pure childhood memories and easy satisfaction. All you need are cherries and a bit of sweetener and you’ll get a chewy treat everyone grabs fast. It’s just as much fun to make as to snack on—plus, you can swap in any fresh fruit that’s sitting on your counter.
When I first cooked up cherry fruit leather my kitchen smelled like summer itself My kids kept grabbing strips straight off the counter before they even cooled
Tasty Ingredients
- Cherries: Juicy and bright fresh cherries are your best pick Look for ones that feel firm and have a deep color
- Water: Helps soften the cherries up so you can blend them smoothly Stick with filtered if you can for the freshest flavor
- Honey or sugar: Just enough to make those tart cherries sweet If you’re skipping sugar grab super ripe fruit for that natural pop
Simple Directions
- Store Rolls:
- Put your finished fruit rolls in something airtight in the fridge If you want them to last even longer toss in an oxygen absorber to keep snacks from getting soggy
- Slice and Roll Up:
- Once the leather’s cool and not sticky peel it off then snip into strips with clean scissors Roll each one gently for that classic fruit roll-up vibe tie with string if you’re feeling fancy
- Dry or Bake ‘Em:
- If you’ve got a dehydrator set it to 125°F and let it dry for six to twelve hours At six hours check by peeling a corner If you’re using an oven go for 170°F cook about five hours and rotate trays You want it tacky, not wet
- Spread Puree:
- Line your baking sheets or dehydrator trays with silicone or parchment Swoosh the blended fruit into a thin even layer—about 1/8 inch—to get the best result
- Blend Everything:
- Pop the hot cherry mix into a blender or food processor Take care with the hot stuff Whizz it up until you can’t see any lumps
- Cook Fruit:
- Tip the pitted cherries plus water and your chosen sweetener in a sturdy pot Get it to a gentle boil, stir a lot Cook until cherries fall apart—about 15–20 mins—then turn the heat off
- Prep the Cherries:
- Wash cherries under cool water and check for leaves or stems Pluck those off Get the pits out by hand or with a pitter Save the pits if you’re thinking about making syrup or jam
 Pin it
I wait all year for cherries so I can whip up this tasty snack The flavor throws me right back into sunny days with my grandma, who always said nothing beats fruit and a little patience for making sweets
How to Keep It Fresh
Homemade fruit leather does best in the fridge—it stays bendy for up to two weeks If you want to save some for months pop it in a container with an oxygen absorber and freeze up to three months Just be sure it’s totally dry before putting away to stop it from going bad
Swap Options
No cherries around? Grab mango peaches or strawberries Instead of sugar try only honey or nothing extra if your fruit is super sweet Want more zing? Squeeze in some lemon juice or add a drop of vanilla for an extra layer
Ways to Snack
Throw cherry fruit leather in the kids’ lunches for a cheerful snack Snack on it after a run or slice it into little cubes to stir into yogurt or cereal It’s always a crowd-pleaser at parties or picnics—just twist up in bits of paper to hand out
 Pin it
Traditions and Origins
Drying blended fruit in the sun started centuries ago as folks figured out how to make fruit last—still common across Asia and the Middle East, where it’s called things like lavashak or pestil These days, making fruit leather at home keeps those old methods alive while cutting down food waste
Frequently Asked Questions
- → Can I use other fruits besides cherries?
For sure! Try strawberries, peaches, blueberries, or pretty much any ripe fruit you like.
- → Is a dehydrator required for making fruit leather?
Nope, no need! Oven on low heat works just as well to dry out the fruit mix.
- → How do I know when the fruit leather is ready?
Touch it—if it's no longer sticky, comes off the tray easy, and feels only a little tacky, it's done.
- → How long does fruit leather last?
Keep it cool and sealed tight, and it'll stay fresh for a few weeks in the fridge, sometimes longer.
- → Can I reduce the sugar for a more tart flavor?
Totally! Just skip or cut down the sweetener if your fruit is already sweet or you want it more tangy.