
 Pin it
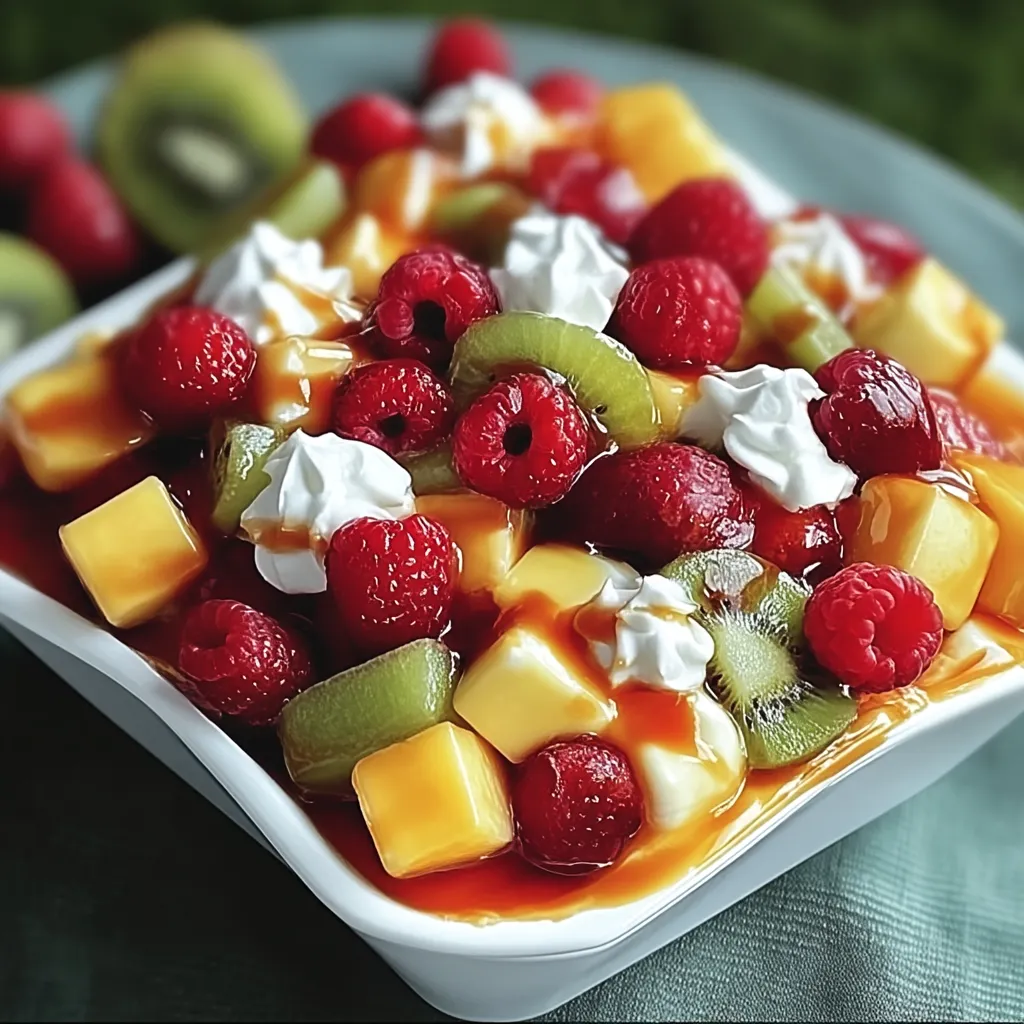
This no-bake dessert turns basic components into something truly special, mixing the richness of a creamy base with the bright, zesty taste of fresh fruits. It's different from your regular fruit bowls that just use honey or yogurt – instead, you'll coat each fruit piece with a velvety cream cheese blend that tastes just like unbaked cheesecake filling. What's really great about it is how flexible it is – you can switch up the fruits based on what's in season, what you prefer, or what looks good at the store while keeping that smooth base consistent. It's perfect for summer parties, shared meals, or whenever you want to wow people without using your oven. You'll get amazing flavor and looks with minimal work.
I came up with this when I needed to make something ahead for a summer party that both grown-ups and kids would enjoy. The feedback was amazing – everyone went for seconds, and before the party ended, four people had asked me how to make it. I couldn't believe how something this simple could taste so fancy. My grandma, who's super picky about sweets, said it was "even better than regular cheesecake" because of all the fresh fruit. Now I always bring it to warm-weather get-togethers, and I make sure I've always got the stuff to make it when friends pop over or when my family wants something special.
Basic Components
- 8 oz cream cheese, softened: Gives you that creamy, tangy foundation that feels like cheesecake
- 8 oz whipped topping: Makes everything airy and soft in the cream mix
- ½ cup powdered sugar: Adds sweetness without any grainy texture
- 1 teaspoon vanilla extract: Brings in some cozy, fragrant notes
- 6 cups assorted fresh fruits: Adds vibrant colors, natural sweetness, and good-for-you stuff
What you put in this simple treat really matters. For cream cheese, make sure it sits out for at least an hour to get properly soft – this stops any lumps from forming. Any whipped topping will work, but the ones with fewer additives usually turn out better. When picking fruits, go for the ripest, freshest ones you can find – they'll give you the best natural sweetness and feel. I usually mix things up with strawberries and raspberries for bright red pops and slight tartness; blueberries and blackberries for dark color contrast; grapes for juicy sweetness; kiwi for that tropical tang and pretty green; and chunks of pineapple for sunny yellow and tropical taste.
Quick Preparation
- Cream Cheese Base Preparation:
- Start with properly softened cream cheese – it should give a bit when pressed but still hold some shape, not be runny or melted. Put your 8 ounces of soft cream cheese in a big mixing bowl. Beat it with an electric mixer on medium for about 2-3 minutes until it's totally smooth with no lumps. Scrape the bowl sides halfway through to mix everything evenly. Getting the cream cheese super smooth now stops lumps later. Once it's perfectly smooth, slowly add the half cup of powdered sugar a little at a time, mixing well after each bit. Add the teaspoon of vanilla and mix just until combined. You should end up with a smooth, slightly sweet mix that smells lightly of vanilla, which goes well with both the cream cheese and the fruits.
- Incorporating the Whipped Topping:
- How you add the whipped topping really matters for keeping things light and fluffy. Switch from your electric mixer to a rubber spatula for this part to avoid overworking the mix, which might deflate the whipped topping. Add the 8 ounces of whipped topping to your cream cheese mix. Using the spatula, gently fold it in with a down-center-up-and-over motion, turning the bowl as you go. Keep folding until everything is the same color with no streaks, but don't overmix. You want a light, fluffy, mousse-like texture that will coat the fruit nicely without being heavy. This usually takes about 1-2 minutes of gentle folding. When it's done, the mix should hold soft peaks and have a silky, spoonable texture that will stick lightly to the fruit without being too runny or stiff.
- Fruit Preparation:
- Getting your fruit ready the right way makes sure your finished treat has the perfect texture and looks great. First, wash everything thoroughly under cool water, then dry completely with paper towels or a clean kitchen towel. Extra water can thin out your creamy dressing, so drying is crucial. Once dry, prep each fruit: cut tops off strawberries and quarter them (or slice if they're really big); leave blueberries and grapes whole unless they're huge; peel and dice kiwis into bite-size pieces; remove the core from pineapple and cut into half-inch chunks; if using bananas, slice them into half-inch rounds just before mixing so they don't brown. Try to make everything roughly the same bite-size so it's easy to eat and every spoonful has a good mix of fruit and creamy dressing. For fruits that brown quickly like apples, bananas, or pears, toss them with a tablespoon of lemon juice first. This adds brightness and stops browning. Put all your prepared fruits in a large bowl, gently tossing to mix the types evenly.
- Final Assembly:
- Putting everything together at the end needs a gentle touch to keep both the creamy mix and fruits in good shape. If you're using mini marshmallows, add the cup of them to your bowl of prepared fruits and toss gently to mix them in. The marshmallows add a fun texture contrast and mild sweetness that works well with both the fruits and creamy dressing. Pour about half of your cream cheese mixture over the fruit and marshmallow combo. Using a large rubber spatula or wooden spoon, fold everything together with a gentle lifting motion from the bottom of the bowl, turning the fruits over rather than stirring, which can crush delicate berries. Once the first half is mixed in, add the rest of the cream cheese mixture and keep gently folding until all fruits are evenly coated with a light layer of the creamy dressing. You want each piece of fruit covered in the cream cheese mixture without crushing or breaking down the fruits. When finished, it should be creamy but still let each fruit keep its own look and bright color.
- Chilling and Serving:
- Cover your bowl with plastic wrap and chill for at least one hour, though 2-4 hours is even better to let flavors blend and the texture set properly. This cooling time helps the cream cheese mixture firm up a bit and lets the natural fruit flavors mix into the creamy base, making everything taste more unified. When you're ready to serve, give the salad a gentle stir to mix up any dressing that might have settled at the bottom. If you want, transfer it to a nicer bowl, especially for parties. For an extra special touch, save a few pieces of the most colorful fruits and put them on top just before serving. Some fresh mint leaves make a pretty color contrast and add a subtle fresh smell. Serve cold, using a big spoon for portions. This treat tastes best when kept cool, so for outdoor events, try putting the serving bowl inside a bigger bowl filled with ice to keep it at the right temperature.
I've tried so many different versions of this creamy fruit mix over the years, and it always gets compliments. I'm still amazed at how something this simple can taste so fancy and satisfying. During berry season, I've made it with just different kinds of berries for an extra fruity version, while winter versions with orange segments and pomegranate seeds have been just as delicious. The first time I brought it to my husband's family gathering, his mom quietly asked for my recipe – which is a huge deal since she hardly ever uses other people's recipes. I've found it works for pretty much any occasion – it's as perfect for a random Tuesday night dinner as it is for holiday celebrations.
 Pin it
Fresh Seasonal Options
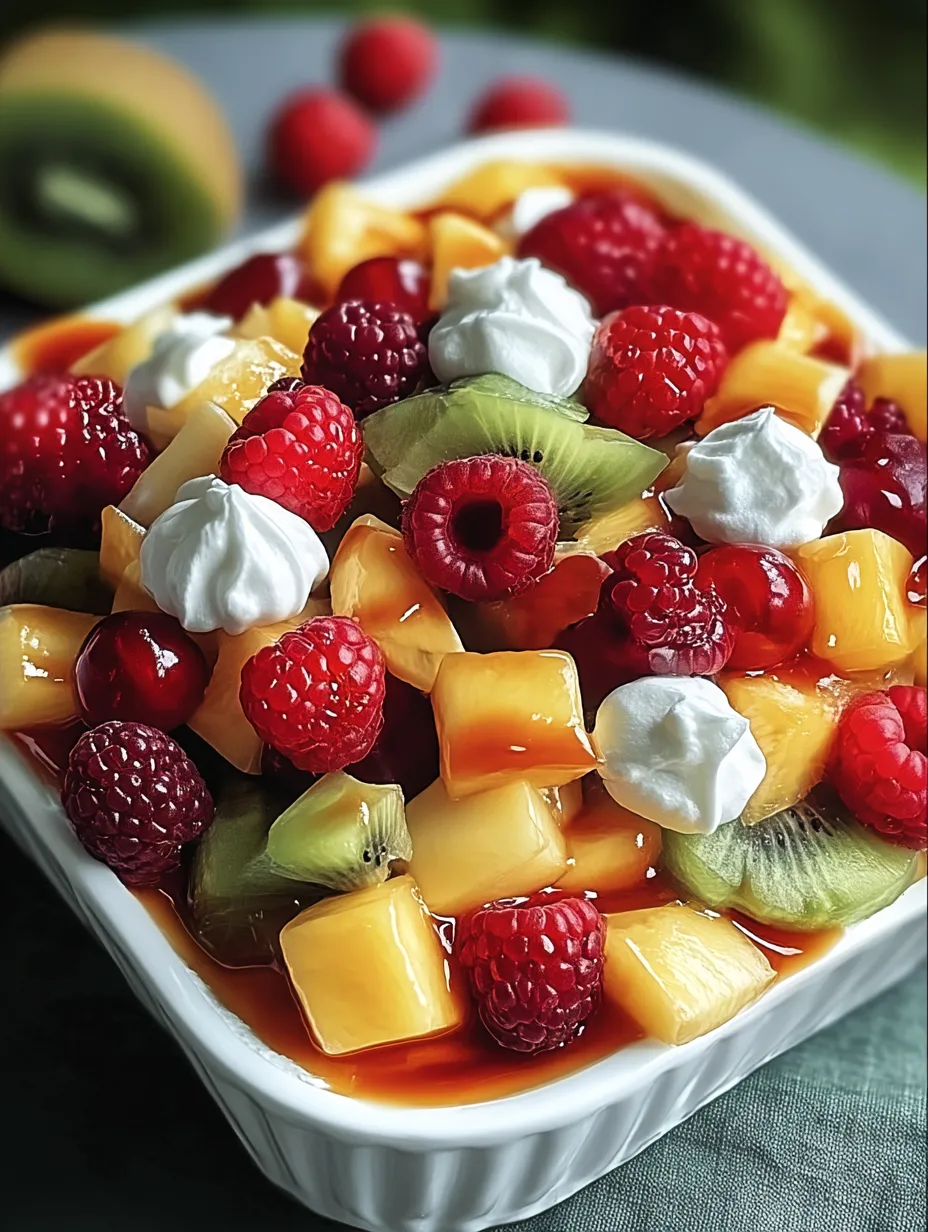
Switch up this flexible treat throughout the year by picking fruits at their peak for best taste, price, and nutrients. Spring versions can showcase fresh strawberries, raspberries, and mandarin oranges, with their bright colors and lively flavors that match the season's fresh start. Summer mixes really shine with juicy peaches, nectarines, and cherries alongside perfectly sweet berries, celebrating all the season's bounty. As fall comes around, try crisp apples, firm pears, and fresh grapes, maybe with a little pinch of cinnamon (about a quarter teaspoon) added to the cream cheese mix to complement these autumn fruits. Winter versions can feature orange, grapefruit, and clementine segments, paired with kiwi and pomegranate seeds for jewel-like colors that brighten up dark winter days. For a tropical feel any time of year, focus on mango, pineapple, papaya, and banana, maybe with a teaspoon of coconut extract mixed into the cream cheese and some toasted coconut sprinkled on top. By changing your fruits with the seasons, you'll always have the best flavors and a dessert that feels fresh and right for whenever you're serving it.
Cool Serving Suggestions
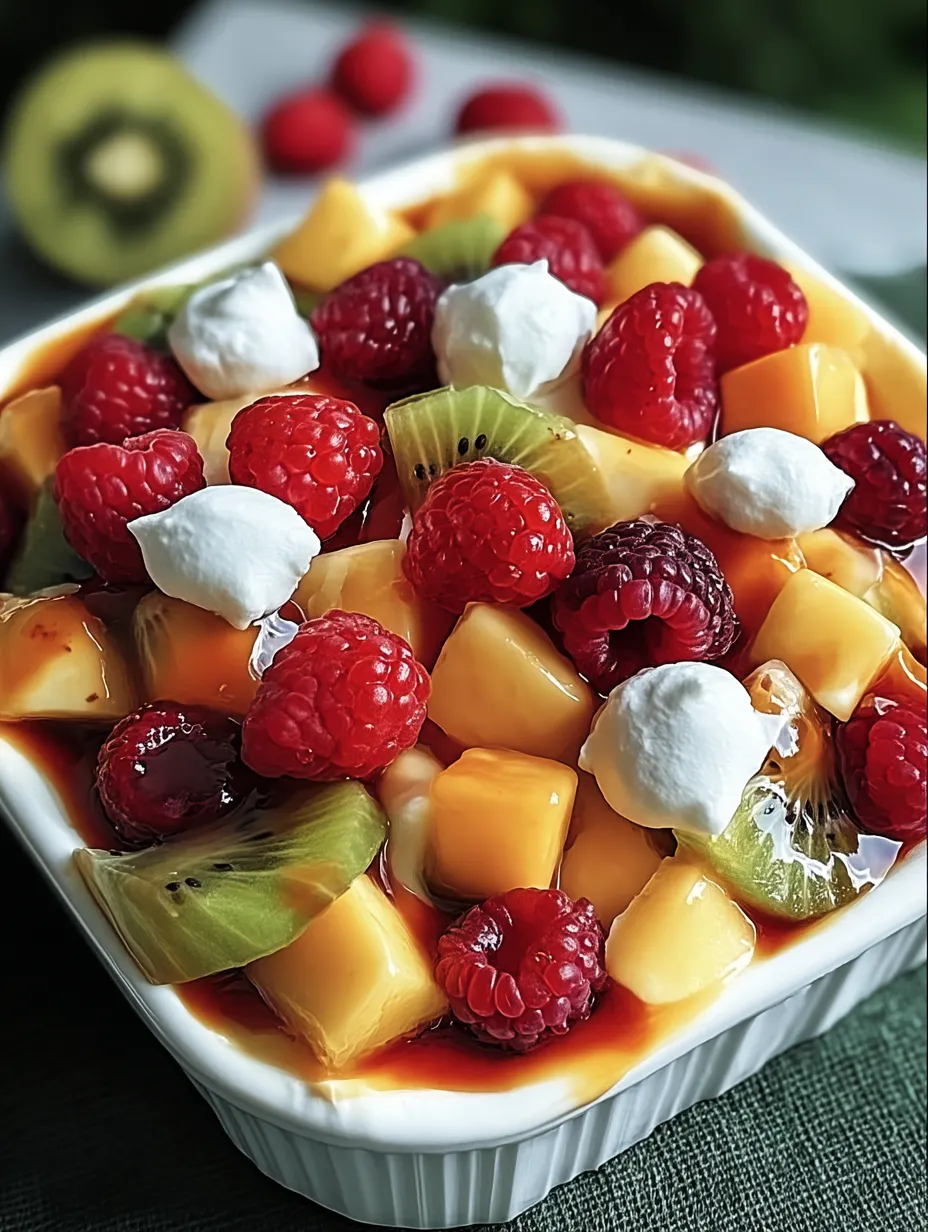
Make this versatile treat work for different occasions by serving it in special ways that take the basic recipe up a notch. For fancy dinner parties, put single servings in clear glass cups or wine glasses, making layers of the cream cheese mix with fruits for a parfait look, topped with a mint leaf and one perfect berry. Create a dessert spread by putting the fruit mix in the middle surrounded by extras like small shortbread cookies, chocolate-dipped strawberries, and little dishes of honey or chocolate sauce for drizzling. For morning gatherings, serve the fruit mix alongside some pastries and coffee, giving a lighter option that still feels fancy enough for a special breakfast. For kids' parties, try a "make your own" station with the cream cheese base in one bowl and different fruits in others, so young guests can build their own dessert with their favorite fruits and extra toppings like sprinkles or tiny chocolate chips. For holiday parties, serve the finished mix in a hollowed-out watermelon half or pineapple shell for a show-stopping look that doubles as an edible bowl, which works especially well for summer gatherings where the fresh presentation matches the light dessert.
Common Problems Solved
Get perfect results every time by knowing how to fix typical issues when making this creamy fruit mix. If you get lumps in your cream cheese mixture, your cream cheese probably wasn't soft enough at the start; next time, let it warm up completely to room temperature, or if you're in a rush, microwave it for a few 10-second bursts until just softened but not melty. If your mixture seems too thin, cool the cream cheese base for 30 minutes before adding the fruits, or mix in 2 more tablespoons of powdered sugar, which helps thicken things up. When your fruits let out too much juice and make the creamy dressing too watery, toss juicy fruits like strawberries or pineapple with a tablespoon of powdered sugar, let them sit in a strainer for 10 minutes to drain extra liquid, then pat them dry before adding to the mix. If bananas or apples turn brown too fast in your dessert, coat them with 1-2 tablespoons of lemon or pineapple juice before adding them in, which stops browning while adding some nice flavor. If your dessert tastes too sweet, balance it out with a tablespoon of fresh lemon juice added to the cream cheese mixture, or use more tart fruits like green apples or raspberries.
Prep Ahead Tips
Save time without losing quality by planning ahead with smart prep and storage for this popular treat. For the best results when making ahead, mix up the cream cheese base up to 24 hours early and keep it covered in the fridge separate from your cut-up fruits, then combine them just 1-2 hours before serving so the fruits don't release too much juice into the mixture. For leftovers, put them in an airtight container and eat within 2-3 days, knowing that the texture will change a bit as fruits continue to release juices – it'll still taste great but becomes more like a creamy fruit soup after the first day. For potlucks or traveling, carry the dessert in a cooler with ice packs, and think about bringing the cream cheese mixture and prepared fruits in separate containers to mix at your destination if you're traveling more than 30 minutes. If using fruits that brown easily like bananas, apples, or pears, put them on top of the salad instead of mixing them in, and gently press plastic wrap right onto their surface before covering the container to limit air exposure. For easy serving and portion control, make individual servings in small mason jars or dessert cups with lids, which makes for easy grab-and-go options from the fridge that still look nice when served.
 Pin it
This creamy fruit mix has become my go-to dish for gatherings – it's what friends and family most often ask me to bring when I offer to make something. What started as a quick fix for a summer party has grown into countless versions for different times of year and events. I love watching people try it for the first time and seeing that look of surprise when they realize it's basically deconstructed cheesecake in a fresher, more fruit-centered form. There's something really rewarding about making a dessert that feels both indulgent and light at the same time, that can change with the seasons, and that combines simple ingredients in a way that becomes something much more special than you'd expect.
Frequently Asked Questions
- → Can I make this with low-fat ingredients?
- Absolutely! You can swap in reduced-fat cream cheese, fat-free yogurt, and light whipped topping. It’ll be a bit less creamy, but still delicious. The pudding mix keeps everything thick and tasty even with the lighter swaps.
- → Which fruits work best in this dish?
- Fruits that hold up well without getting too watery are ideal. Think berries, grapes, and kiwi, along with drained canned options. If you’re into softer fruits like bananas or peaches, toss them in at the last minute before serving. Juicy options like watermelon aren’t the best choice since they can make everything too wet.
- → Can I skip the pudding mix?
- You can! Just bump up the powdered sugar to 1/2 cup and add 4 more ounces of cream cheese. A splash of lemon juice and a little more vanilla can also help nail that cheesecake flavor without the pudding.
- → How early can I make this ahead of time?
- You can mix up the cheesecake filling a day ahead and keep it in the fridge. Blend it with the fruits about an hour before serving for best results. If you make the entire salad early, it’ll last a couple of days in the fridge, but the fruits might release some juice over time.
- → What other things can I serve with this?
- This salad goes great with graham crackers or shortbread for dipping. For a full dessert table, pair it with chocolate-dipped strawberries, little tartlets, or cookies. If you're setting up a brunch, it’s also fantastic alongside coffee cake, muffins, or yogurt parfaits.