
 Pin it
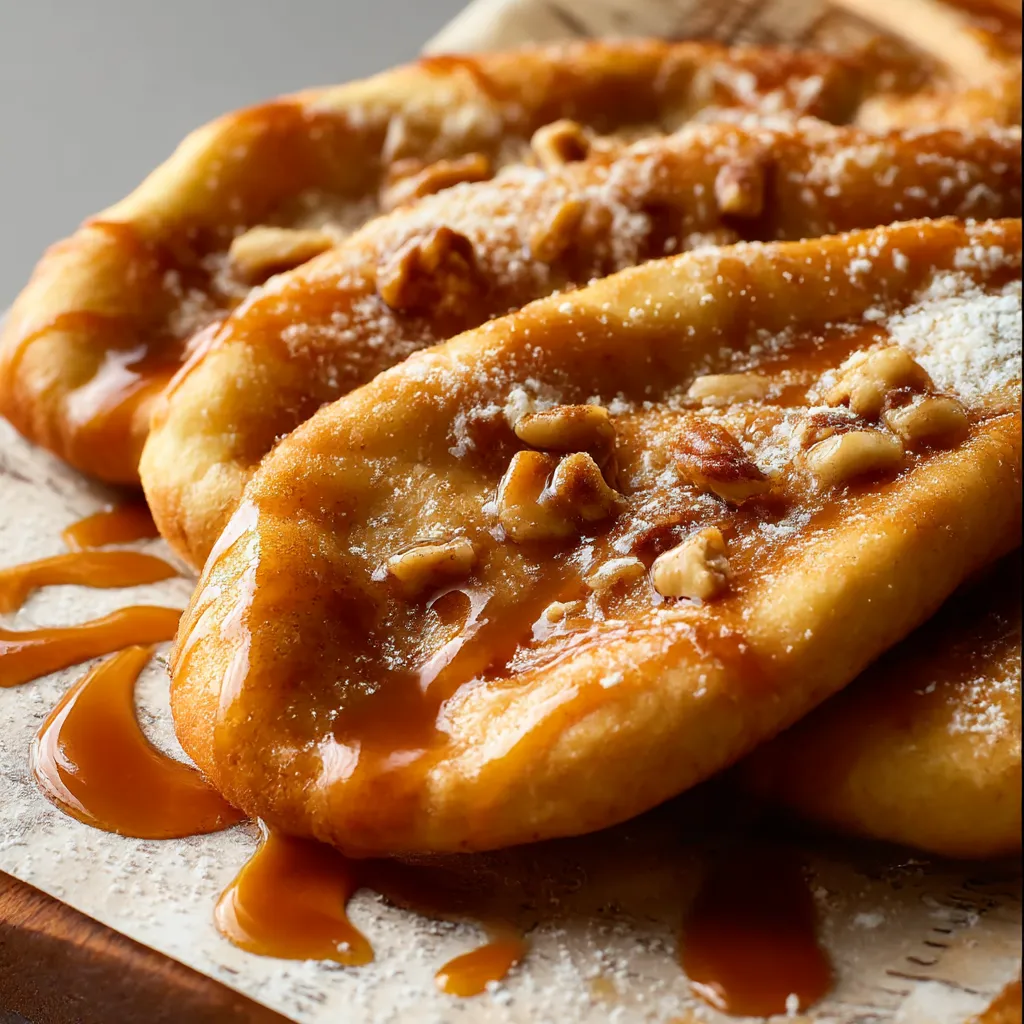
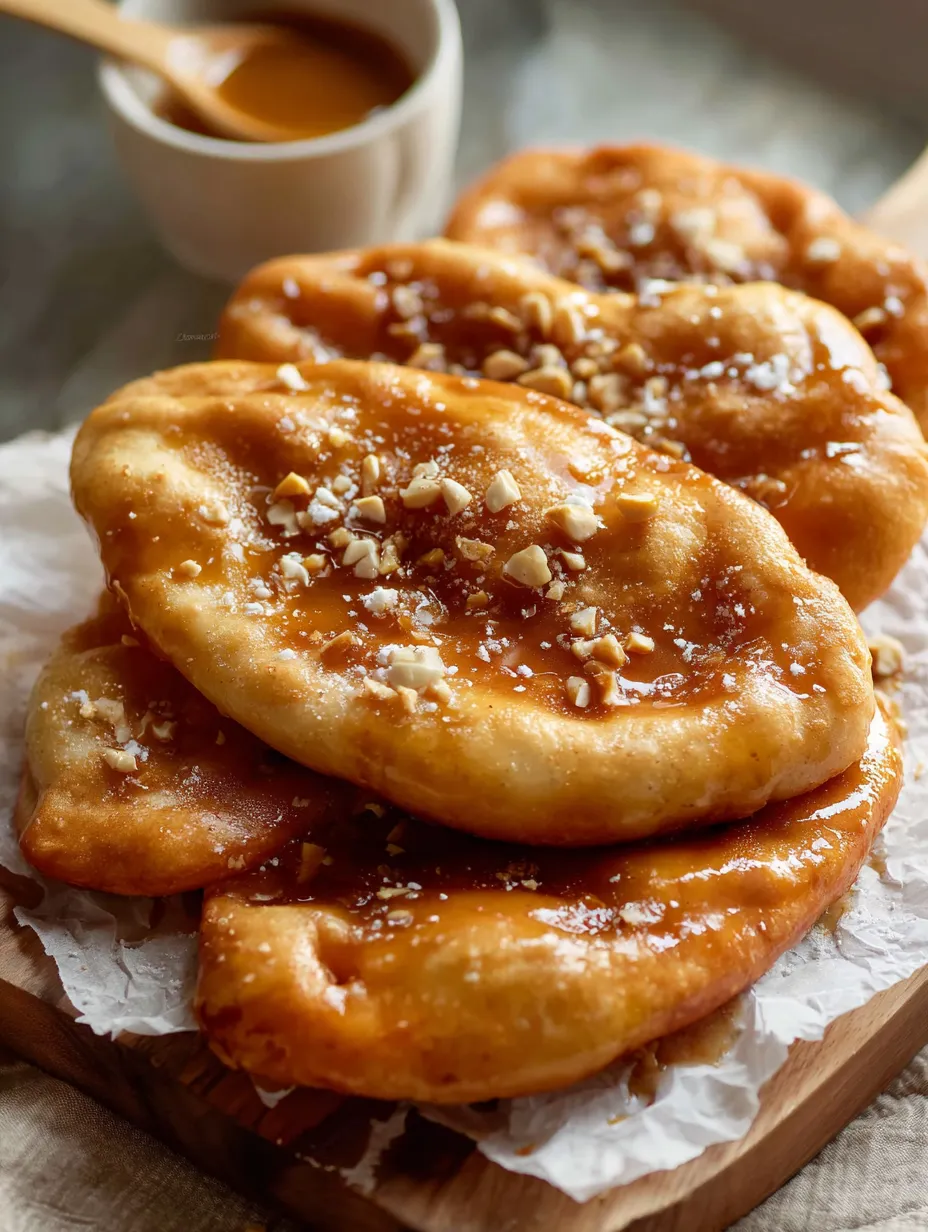
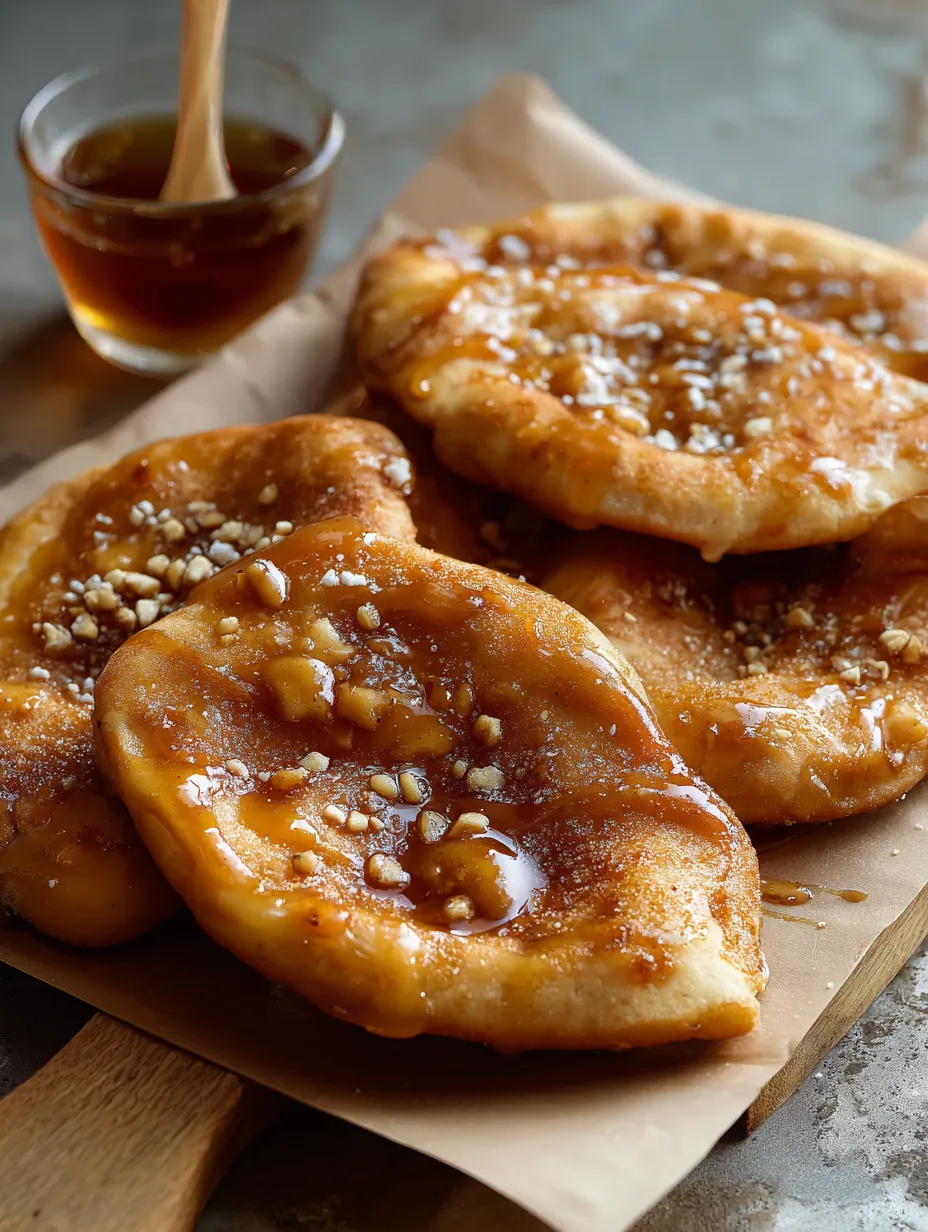
I fell in love with Maple Beaver Tails the first time I tasted one on a snowy Canadian trip. They're crispy on the rim, tender in the middle, and finished with a shiny maple glaze you can't resist. You don't need to travel north to enjoy one—these bring street cart magic to your kitchen.
Trying Beaver Tails for the very first time in frosty Ottawa was a total game-changer for my sweet tooth. Now every time I fry up a batch at home I’m hit with a wave of happy nostalgia.
Irresistible Ingredients
- Vegetable oil: Used for frying. Go for a plain oil with no strong taste and be sure it’s fresh
- Maple syrup: Total must-have for the glaze—pick real deal Grade A amber if you can
- White sugar: Adds sweetness and kick-starts the yeast. If you can, use pure cane sugar
- All purpose flour: Main dough favorite. Unbleached flour gives it richer flavor
- Poweded sugar: Sifted into the glaze for a silky sweet finish
- Instant yeast: Lifts the dough so it’s airier. A good brand makes a difference
- Salt: Balances things out for a better-tasting dough. Fine sea salt melts in best
- Vanilla extract: Takes the maple to the next level. Only use pure for fullest taste
- Unsalted butter: Brings out the richness, both in the dough and glaze. Go with European-style if you see it
- Lukewarm water and whole milk: Team up for that perfect soft dough—just warm, not hot
Easy-To-Follow Steps
- Coat and serve:
- Brush glaze over the hot breads as soon as they're fried. Sprinkle on extra powdered sugar if you want—it’s messier but tastier. Eat while still warm!
- Time to fry:
- Pour about an inch of oil into a deep skillet and heat it up to 350°F. Drop in one or two ovals at a time and fry till the first side bubbles and turns golden, about 90 seconds. Flip, let the other side get color, then drain them over a rack
- Shape your dough:
- Punch the dough down after rising. Split into 6 or 7 pieces, shape into balls, then squish and stretch them into ovals. A bit of oil on your hands makes it simple. You’re aiming for thin—these'll puff and crisp up
- Mix up the glaze:
- Melt butter and let it bubble until it turns deep golden and smells nutty—just takes a few minutes. Immediately pour it in a bowl so it doesn’t burn. Whisk in vanilla, maple syrup, then sifted powdered sugar. Stir till it’s really smooth and shiny
- Brown the butter first:
- Pop the butter into a saucepan and melt over medium. Let it cook, stirring here and there, ‘til it starts browning and smells toasty around minute five or six. Don’t let it burn! Move it right to a bowl to chill
- Let it rise the first time:
- Lightly oil a big bowl and set your dough inside. Cover up snug with plastic and a towel, then put in a cozy (not breezy!) spot. After about an hour it should have puffed up to double size—trust me, this means the lightest bread
- Knead it together:
- Add the salt, flour, and sugar to your milk-yeast mix. Either go by hand or use a mixer and dough hook until it starts coming together. Pour in the melted butter, then knead a minute until it's all smooth and stretchy
- Wake up the yeast:
- Combine lukewarm milk and water in a big bowl. Sprinkle yeast on top and whisk in ‘til dissolved. Wait about five minutes for it to get a little foamy—if it’s bubbling, it’s all set
 Pin it
Every time I crack open a jug of real maple syrup, I get instantly transported back to cozy mornings at my grandma’s. The smell is wild—so sweet and earthy. Once you stir it into browned butter for glaze, your whole kitchen is gonna smell like a dream.
Storage Basics
If you’ve got leftovers, wrap your treats in parchment and keep in something airtight on the counter for a day. To keep longer, pop them in the fridge but they’re yummiest on day one. Warm them up in the oven for crunch—skip the microwave. Extra glaze? Seal in a jar and chill. It’ll keep about five days. Warm it gently before slathering on more.
Switch-Ups For Ingredients
If you’ve only got active dry yeast, just let it sit in warm liquid a bit longer before moving on. Want the glaze lighter? Use less powdered sugar. No dairy needed—the dough works with almond milk and coconut oil is great for both dough and glaze if you’re skipping butter.
Ways To Top
Don’t just stop at maple glaze—these are awesome with all sorts of toppings. Sprinkle cinnamon sugar over, add chocolate chips, or swipe Nutella on while they’re warm. Crushed pecans give great crunch, and if you’re feeling over the top, try a scoop of vanilla ice cream.
 Pin it
Canadian Roots
Beaver Tails are totally a Canadian thing—you’ll spot folks queuing up for them at winter carnivals, skating rinks, and city streets all across the country. Saw a red BeaverTails stand? You know you’re in Canada. Making these at home is my way of bringing that cozy Canadian feeling, no matter where I am in the world.
Frequently Asked Questions
- → What keeps the inside soft and the outside crunchy?
Warm milk, fast-acting yeast, and just a bit of kneading make a dough that's stretchy and soft. Frying puff it up and gives a crispy bite.
- → How do you make browned butter for the topping?
Put butter in a pan on medium, let it bubble and turn golden. Once it smells kind of nutty, take it off so it won't burn. Give it a stir to make sure it's browning evenly.
- → Can I prep these ahead of time?
Yep! Let the dough rise, then pop it in the fridge covered. Only fry and add the glaze when you're set to eat, so they're at their best.
- → What's a good pick for frying oil?
Grab something plain like canola or vegetable oil. Get it nice and hot, around 350°F, so your dough cooks up golden and tasty and the glaze shines through.
- → How should I shape each piece?
Cut the dough into chunks, roll them into balls, then squish into ovals. Oily hands or a rolling pin help keep things smooth and soft.
- → Do I need real maple syrup for the glaze?
Maple syrup is classic, but you can swap in honey or vanilla icing if that's what you've got. It'll still come out sweet and smooth.