
 Pin it
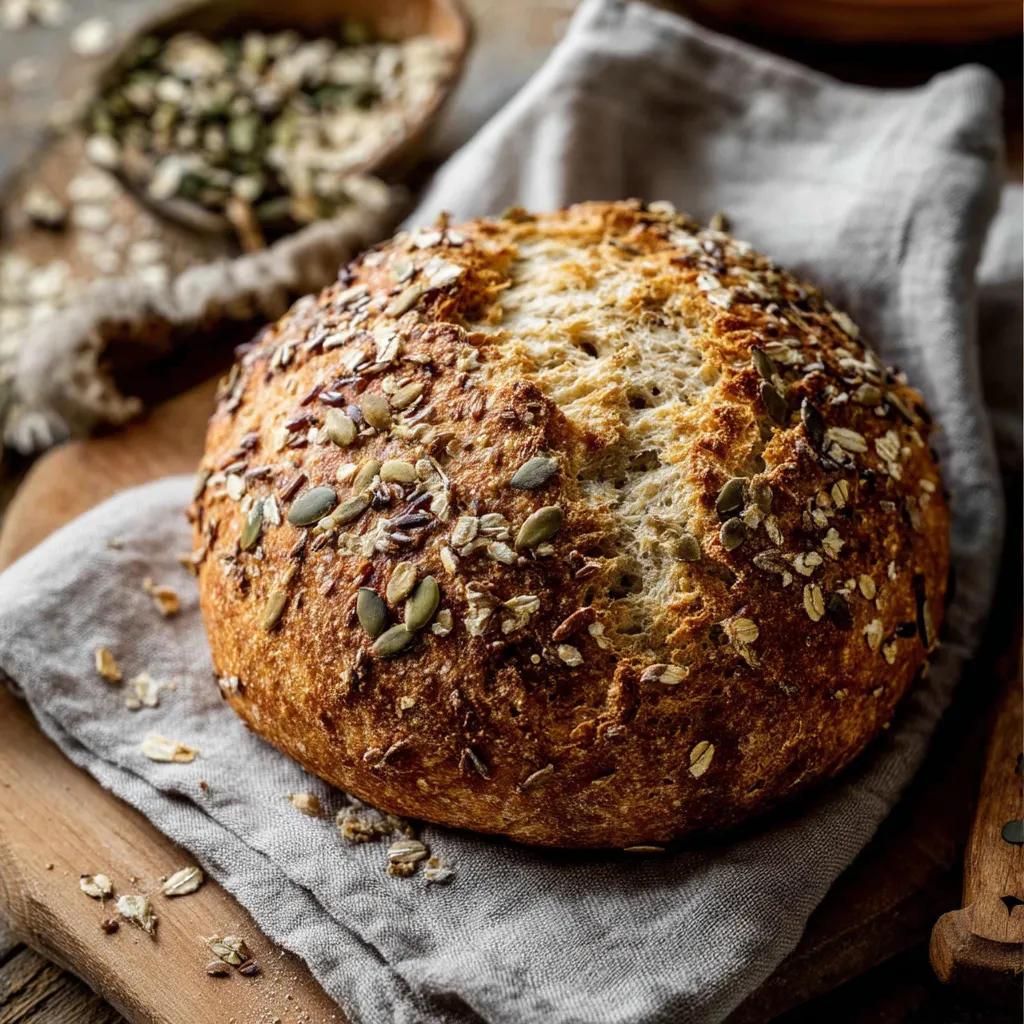
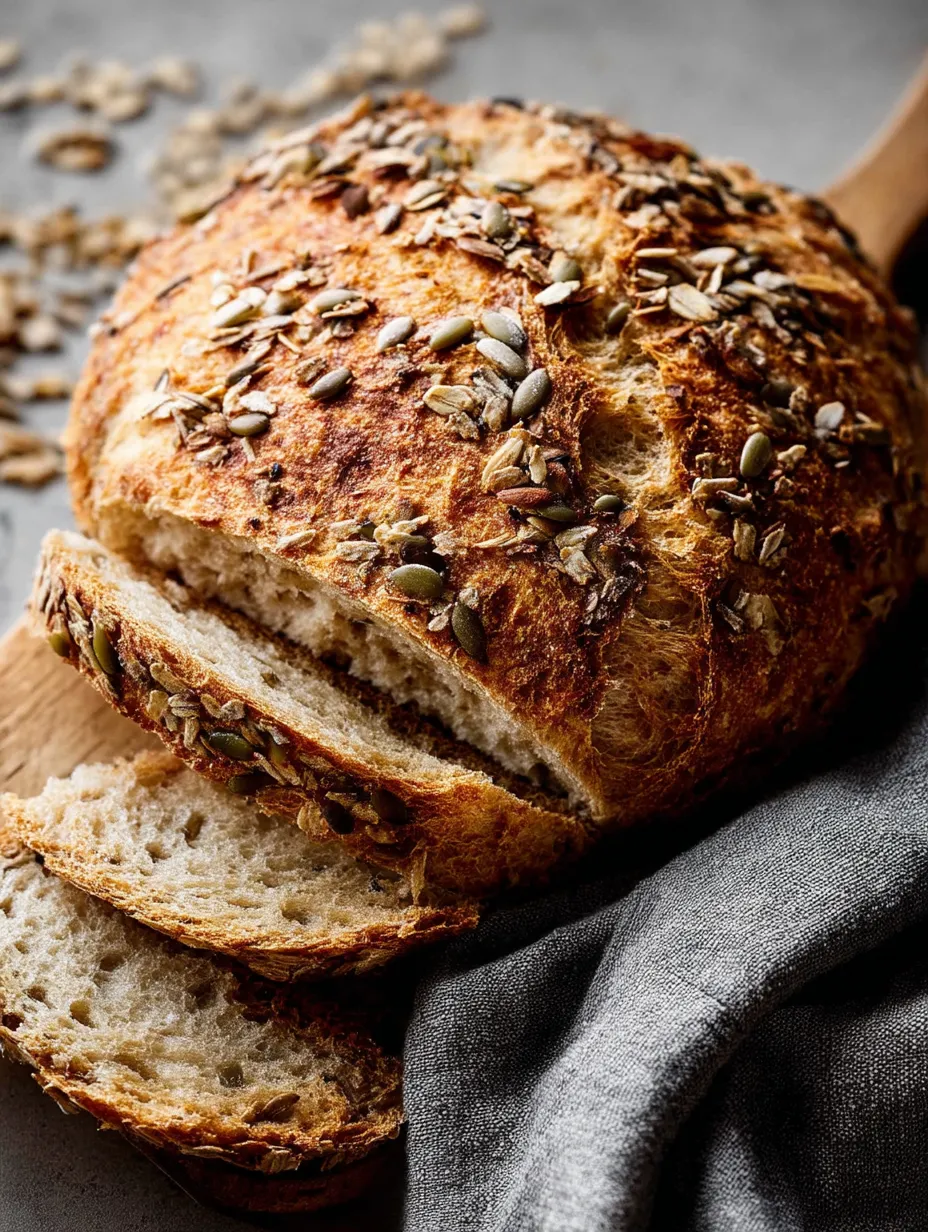
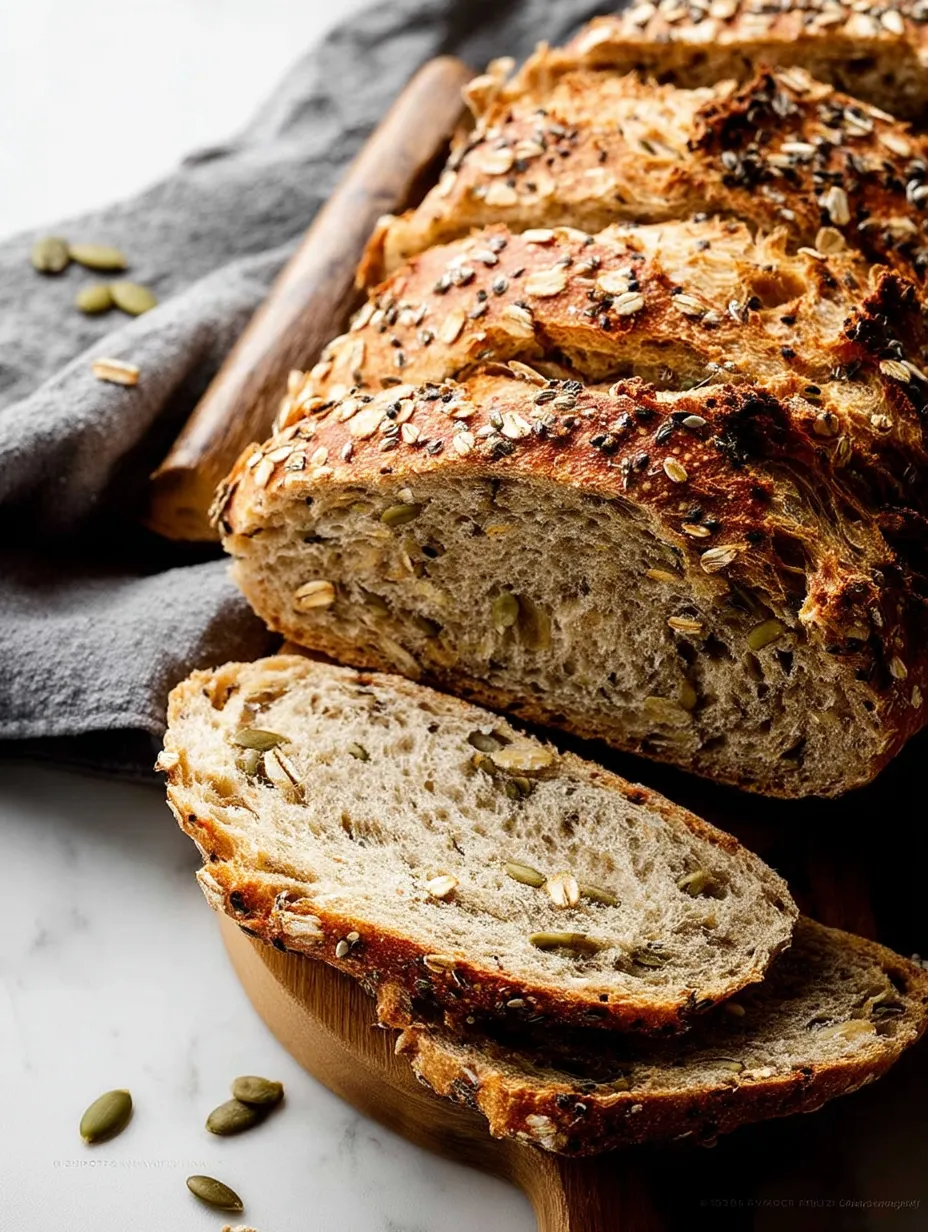
A crunchy, golden outside gives way to a stretchy, seed-filled inside, making a top-quality loaf that takes little work. This homemade bread mixes beneficial seeds and wholesome oats in a dough that gets amazing flavor without any kneading. The easy method gives you a country-style loaf that seems pro-made but mostly needs waiting time, so it's great for newbies and old hands alike.
I stumbled on this bread method during an extra hectic week when I wanted homemade bread but couldn't spend time on traditional kneading and watching it rise repeatedly. The first batch came out of my oven looking so professional and tasting so rich that my family instantly fell in love with it. My next-door neighbor actually wondered which fancy bakery I'd gone to when I dropped off a warm loaf last winter.
Key Ingredients
- Bread flour: builds a tougher, more stretchy dough that catches air well during rising
- Whole rolled oats: soak up water while resting, growing to make hearty bits all through the bread
- Coarse sea salt: spreads taste better than regular salt and brings out the natural nutty hints in the seeds
- Instant yeast: helps the dough rise steadily without needing any prep work first
- Pumpkin seeds: add rich, creamy flavor and satisfying snap both inside and on the bread top
- Sunflower seeds: bring light texture and mild sweetness that works well with the stronger elements
- Flax seeds: offer health perks and pretty looks with their small, unique shape
- Honey: adds soft sweetness while helping create that perfectly bouncy middle texture
- Warm water: wakes up the yeast properly, helping it work despite the extra weight from oats and seeds
Baking Success
- Mix Dry Stuff:
- In a big bowl, stir together bread flour, oats, salt, and instant yeast until they're well mixed.
- Toss In Seeds:
- Add your pumpkin, sunflower, and flax seeds, mixing them around so they spread out in the dry blend.
- Fix Wet Mix:
- Mix warm water with honey, stirring until the honey fully melts.
- Make Rough Dough:
- Pour the warm honey water into your dry stuff and stir with a wooden spoon or rubber scraper.
- Let It Grow:
- Cover your bowl with plastic wrap or a clean towel and let the dough sit at room temp for about 3 hours.
- Grow Better Taste:
- Put the bowl in your fridge for at least 2 hours or as long as 3 days.
- Form With Light Touch:
- When you're ready to bake, use flour-covered hands to softly shape the cold dough into a round ball.
- Add Crunchy Top:
- Scatter extra seeds and oats on the outside of your shaped dough.
- Make Steam:
- Whether you use a dutch oven or cookie sheet, making steam while baking creates that fancy bakery-style crust.
- Cut For Growing:
- Right before baking, use a sharp knife to make a shallow design across the dough top.
- Cook Till Brown:
- Bake until the outside turns deep golden-brown and the loaf sounds empty when you tap it.
- Wait To Cut:
- Let your baked bread cool on a wire rack for at least 1 hour before slicing.
I really enjoy making this bread in winter when the warm oven and wonderful smell make the house feel so snug. My daughter now calls it our "weekend habit" bread since we often mix it Friday night and bake it Saturday morning. The honey gives it just enough sweetness for great toast, but it's still savory enough for sandwiches and dunking in soup.
Tasty Combinations
- With Soup:
- Enjoy thick pieces of this hearty bread alongside a chunky vegetable soup for a filling meal.
- Breakfast Toast:
- For breakfast, toast slices until crispy and pile on smooth avocado and runny eggs.
- Cheese Board:
- When friends come over, put together an amazing cheese board with this bread as the star.
 Pin it
Tasty Twists
- Fruit & Nut Version:
- Switch up this flexible loaf by mixing in dried cranberries and broken walnuts.
- Savory Herb:
- For a more dinner-friendly option, add 2 tablespoons of fresh rosemary and a tablespoon of lemon zest.
- Cheese Lover's:
- If you love cheese, fold in 1 cup of grated aged cheddar or broken feta before shaping.
Keeping Fresh
- Short-Term Storage:
- Keep this bread tasting its best by putting it cut-side down on a cutting board for the first day.
- Longer Storage:
- To keep it longer, wrap the totally cooled loaf in a clean kitchen towel.
- Freezing:
- If keeping past two days, cut the whole loaf and freeze portions in sealed containers.
 Pin it
Making this seeded bread links me to baking traditions going back centuries, but with an easier, modern touch. There's something really fulfilling about throwing simple ingredients together and coming back later to find them changed into something so impressive. The process needs patience more than skill, making it perfect for busy days when you want homemade quality without constant fussing. When I cut into a fresh loaf and see all those pretty seeds dotting the inside, I remember that some of life's best things need time, but hardly any effort.
Frequently Asked Questions
- → How is kneading skipped here?
- Instead of manually kneading, the gluten develops naturally over time. Letting the dough sit for about 3 hours at room temperature (plus optional chilling) gives it structure, making kneading unnecessary.
- → Can I switch out the seeds with something else?
- For sure! Feel free to use seeds you love or swap in others like poppy seeds or chia seeds. Just keep the overall quantity around 1/2 cup for larger seeds and about 2 tablespoons for smaller ones.
- → Do I have to refrigerate the dough?
- Not absolutely, but chilling for 12 hours (or more) boosts the taste and makes it easier to work with. If you're short on time, baking after the initial rise works too.
- → Why is my dough crazy sticky?
- The dough's high moisture content makes it sticky—but that's what gives the bread its soft middle. Flour your hands liberally to handle it more easily, and don't stress about perfection—it’s a rustic loaf!
- → Can I skip the Dutch oven?
- Totally. A baking sheet works fine. For a crispy crust, add a tray of water into the oven while baking to create some steam.