
 Pin it
I've spent so many years playing around with this recipe, and I'm thrilled to finally share my ultimate scone formula! It's become my go-to whether I'm whipping up chocolate chip ones for weekend coffee, making herb-packed savory versions, or folding in berries for a fancy tea time treat. The real win is nailing that combo of soft, flaky centers with those crunchy, golden edges. Let me spill all my tricks for homemade scones that'll put your local bakery to shame!
The Special Touch in These Treats
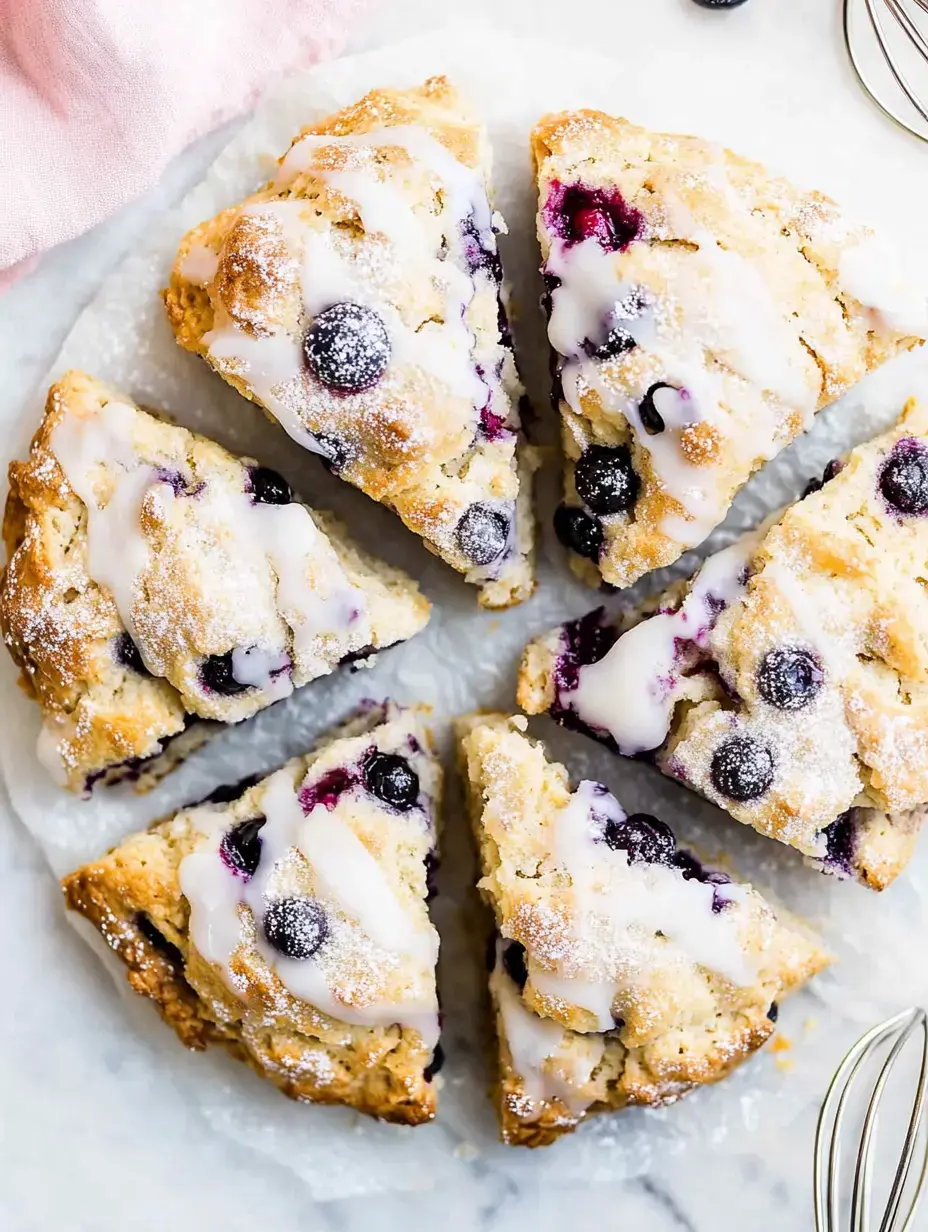
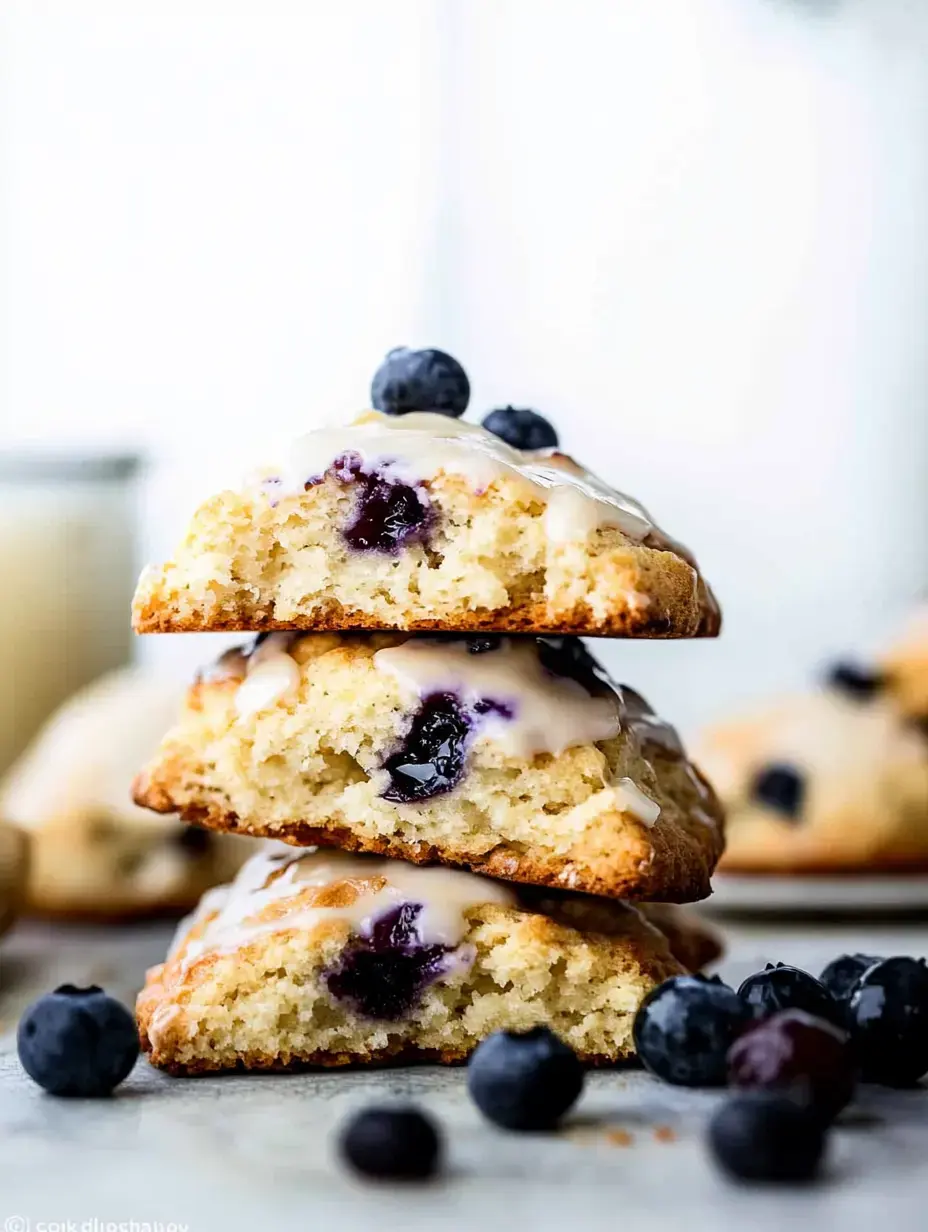
What sets these scones apart is their incredible feel - they're flaky and tender inside while sporting crispy edges that snap perfectly. Say goodbye to those dry, crumbly disasters! I've gone through tons of batches to find exactly how to get them rising tall and staying moist. They work great for fancy gatherings or quiet morning moments with your tea. And guess what? They're actually way easier to make than most people think!
Key Components
- All-Purpose Flour: Gives you that soft base you want - I've tried many kinds and this one wins hands down.
- Sugar: Added in just the right amount for sweet versions, but you can cut it back for savory ones.
- Baking Powder: This makes them rise properly - always check that it's fresh!
- Salt: Just a dash brings out all the other flavors.
- Butter: It absolutely must be frozen! This isn't optional if you want those flaky bits.
- Heavy Cream: Brings a richness that nothing else can match.
- Egg: Helps everything hold together and gives that wonderful golden look.
- Vanilla Extract: For sweet versions, get the real stuff - you'll taste the difference.
Creating Your Ideal Treats
- Mix Your Dry Stuff First
- Stir together your flour, sugar, baking powder, and salt thoroughly. The stirring step matters - it makes sure everything spreads evenly.
- The Frozen Butter Secret
- Here's my total game-changer: take frozen butter and grate it right into your dry mix. This creates amazing texture!
- Combine Liquid Elements
- Mix your cream (or use buttermilk), egg, and vanilla until they're smooth.
- Easy Does It
- Pour wet stuff into dry ingredients and mix just enough to combine. Don't overdo it here.
- Form Without Fuss
- Press into a round on a floured counter, then cut into wedges. Brush with some cream and sprinkle sugar for that pro look.
- Chill Time Matters
- The 15-minute cool down isn't optional - it's what keeps those gorgeous layers intact.
 Pin it
Insider Tricks
- Why Frozen Butter Works: It creates those wonderful pockets of flakiness.
- Chill Everything Down: All your stuff should come straight from the fridge.
- Don't Skip Cooling: That pre-oven rest helps them rise right and get the perfect feel.
- Good Stuff Makes Good Scones: Use the nicest cream and butter you can get - you'll notice it when you take a bite.
Customizing Your Creation
You can go wild with options! For sweet ones, try throwing in chocolate bits, fresh berries, or some citrus zest. Savory versions taste amazing with cheese, fresh herbs, or crispy bacon bits. Just remember to adjust how much sugar you use and leave out the vanilla when going savory. Whatever you add, fold it in gently to keep that awesome texture.
Fixing Common Problems
When your scones flatten out too much, chances are your butter got too warm. Keep everything nice and cold and work fast. If they turn out too dense, you probably mixed the dough too much - just stir until things come together and handle it lightly. These little details turn OK scones into amazing ones.
 Pin it
Keeping Them Fresh
- Plan Ahead: Form them, freeze on a tray, then pop into freezer bags for later.
- From Freezer to Oven: Just cook a bit longer when baking frozen ones.
- After They're Baked: Put in a sealed container, warm briefly in the oven before eating.
Two Main Varieties
This base recipe works great for both types. Sweet ones shine with fruits, chocolate or spices mixed in, while savory versions taste amazing with cheese, herbs or veggies added. The core recipe adjusts perfectly to match whatever flavors you're going for.
Great for Any Gathering
These treats fit right in at any get-together. They look fancy enough for special brunches but they're simple enough for everyday breakfasts too. Make them ahead when you're hosting friends or just enjoy them hot from the oven on a lazy weekend morning.
 Pin it
Endless Add-In Options
You can add so many different things to this basic mix. Fresh fruits, dried fruits, nuts, chocolate chunks, cheese bits, fresh herbs - they all blend in nicely. Just remember to fold them in softly at the end so you don't mess up that delicate texture.
Getting That Perfect Feel
The real trick to amazing scones is getting just the right texture - soft and flaky inside with crisp, golden outsides. This comes from using the right method: cold ingredients, minimal stirring, and proper cooling time. Follow these steps and you'll get fantastic results every time.
Planning Ahead
You can get the dough ready and keep it in the fridge overnight or stick it in the freezer for longer. This means you can have fresh-baked treats whenever you want. Just wrap them up well and cook them a little longer if they're frozen.
Nailing the Right Texture
The way to get perfect texture is handling everything gently and watching temperatures carefully. Don't mix too much, keep all your ingredients cold, and give them enough chill time. These steps guarantee soft, flaky treats every single time.
 Pin it
Keeping Them Fresh
Put your baked scones in a sealed container to keep them fresh. They taste best if eaten within a couple days, but you can freeze them if needed. A quick warm-up in the oven brings back that just-baked taste perfectly.
Changing With The Seasons
Switch up your scones based on what's in season. Summer berries, fall pumpkin, winter citrus - each time of year offers unique flavors to try out. This flexibility keeps the same basic recipe interesting all year round.
Frequently Asked Questions
- → Can I prepare the dough early?
Totally! Shape the dough and store it in the fridge overnight or freeze for months. Bake straight from frozen and extend the bake time a bit.
- → How do I stop them from spreading?
Keep your ingredients ice-cold and chill shaped dough for 15+ minutes. If they still spread, push them back into shape while warm using a spatula.
- → What's the best way to keep them fresh?
Store at room temp for up to 2 days or fridge for 5. Freeze baked ones too—just let them thaw and warm before enjoying.
- → Can I bake mini versions?
Yep, split dough into two smaller discs, making smaller wedges. Cut bake time to around 18-20 minutes.
- → What additions work well?
Add up to 1.5 cups of chocolate, nuts, berries, or diced fruit. Use frozen fruit as-is, and peel items like apples or pears before adding.
Conclusion
A go-to scone method offering endless possibilities for sweet or savory versions. Get pro-level tips to achieve perfect flavor and fluffiness.