
 Pin it
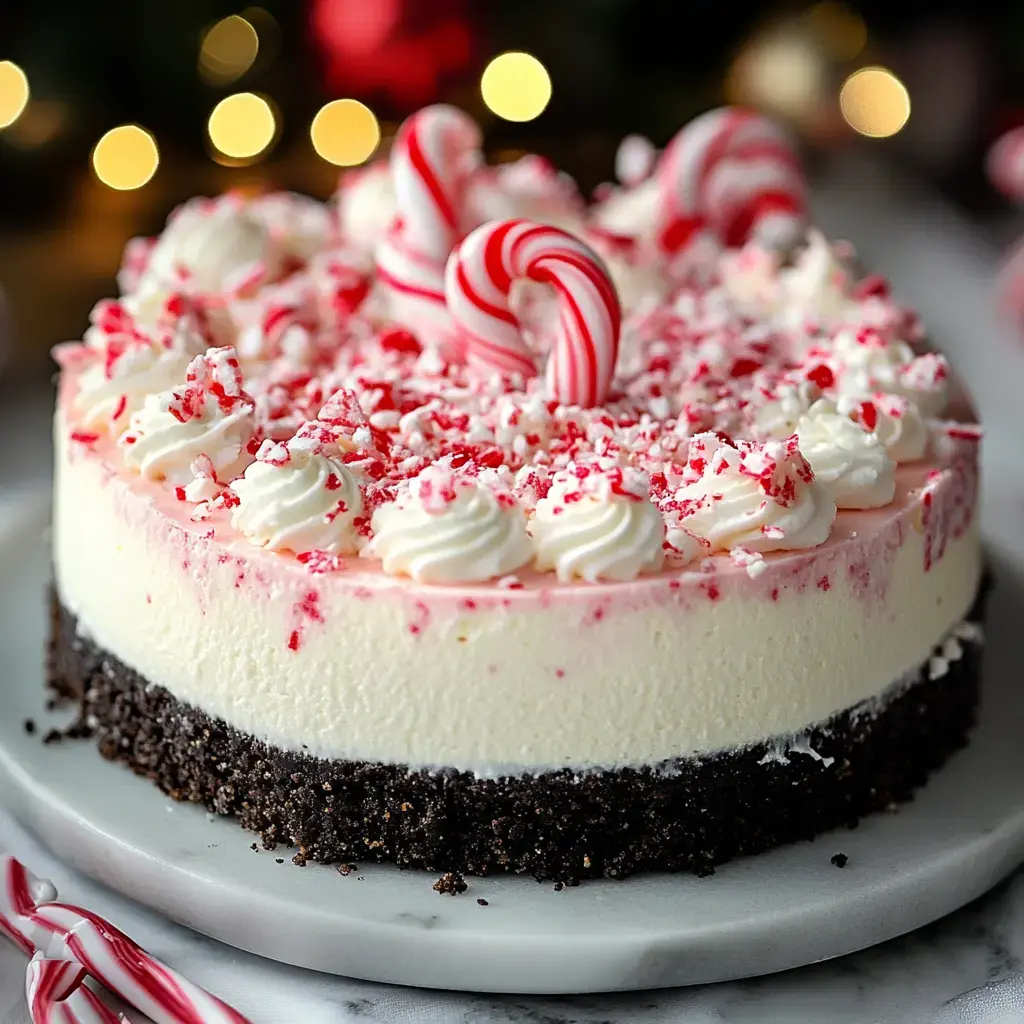
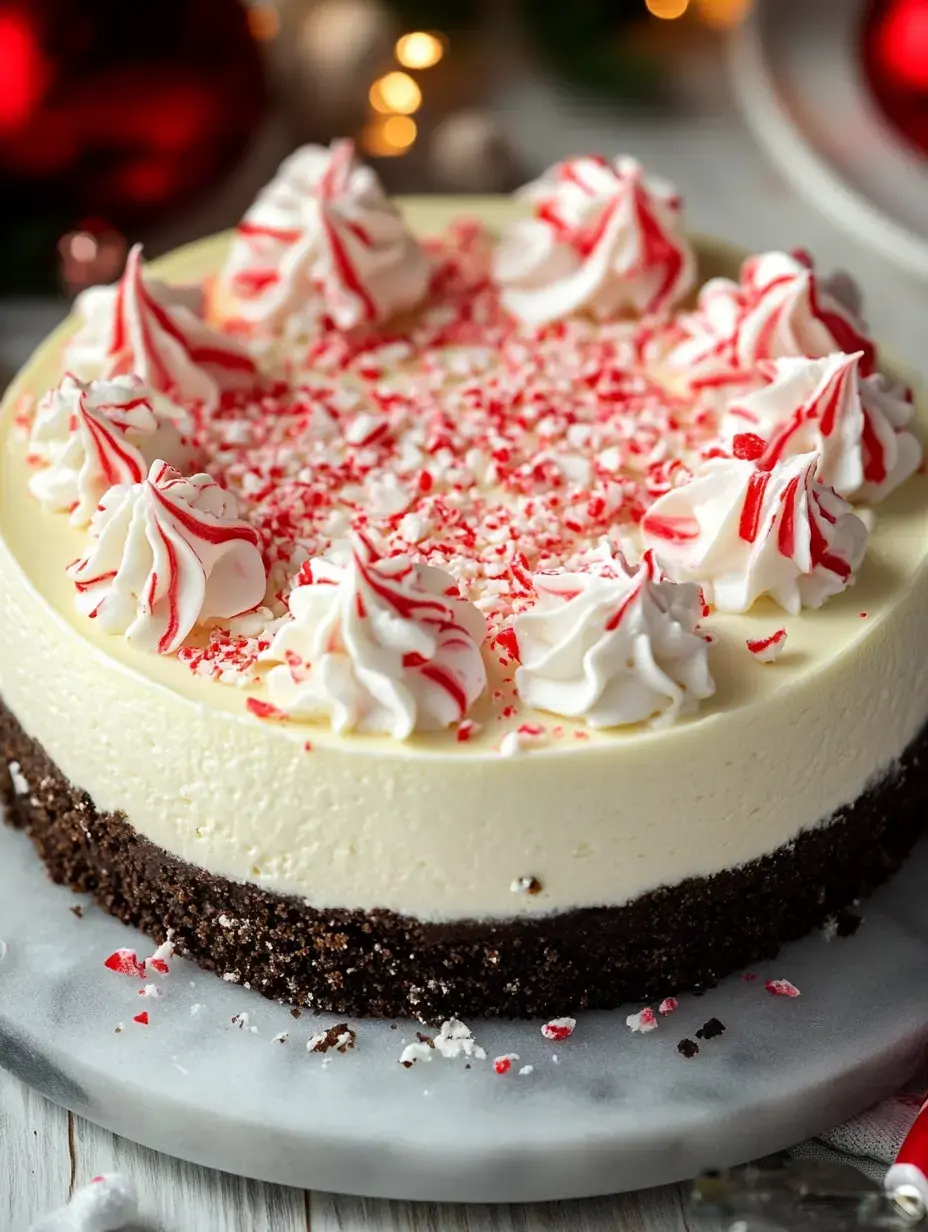
I've gotta tell you about my go-to holiday knockout dessert - this Minty White Chocolate Oreo Cheesecake! I came up with this treat when my family couldn't pick between peppermint bark or cheesecake for Christmas dessert. The crunchy cookie base topped with velvety white chocolate filling, chunks of chocolate, bits of candy canes, finished with fluffy mint mousse and pretty striped topping - it's seriously the most festive treat you'll ever put on your table!
Building a Crunchy Foundation
What's underneath matters a ton! I found that grabbing Peppermint Oreos (when they're around) makes this dessert incredible, though standard Oreos do the job great too. Here's what I learned after several attempts - grind those cookies until they're completely fine, then add just enough melted butter so it sticks when pressed down. Add too much butter and you'll get a rock-hard base; too little and it falls apart. Getting this right really changes everything!
The Main Attraction
- White Chocolate Wonder: Don't skimp on chocolate quality - I found out this matters when my filling turned grainy once!
- Mint Intensity: Go lighter with the extract at first; you can always put more in.
- Fun Crushing Job: My little ones love smashing candy canes in plastic bags with our rolling pin.
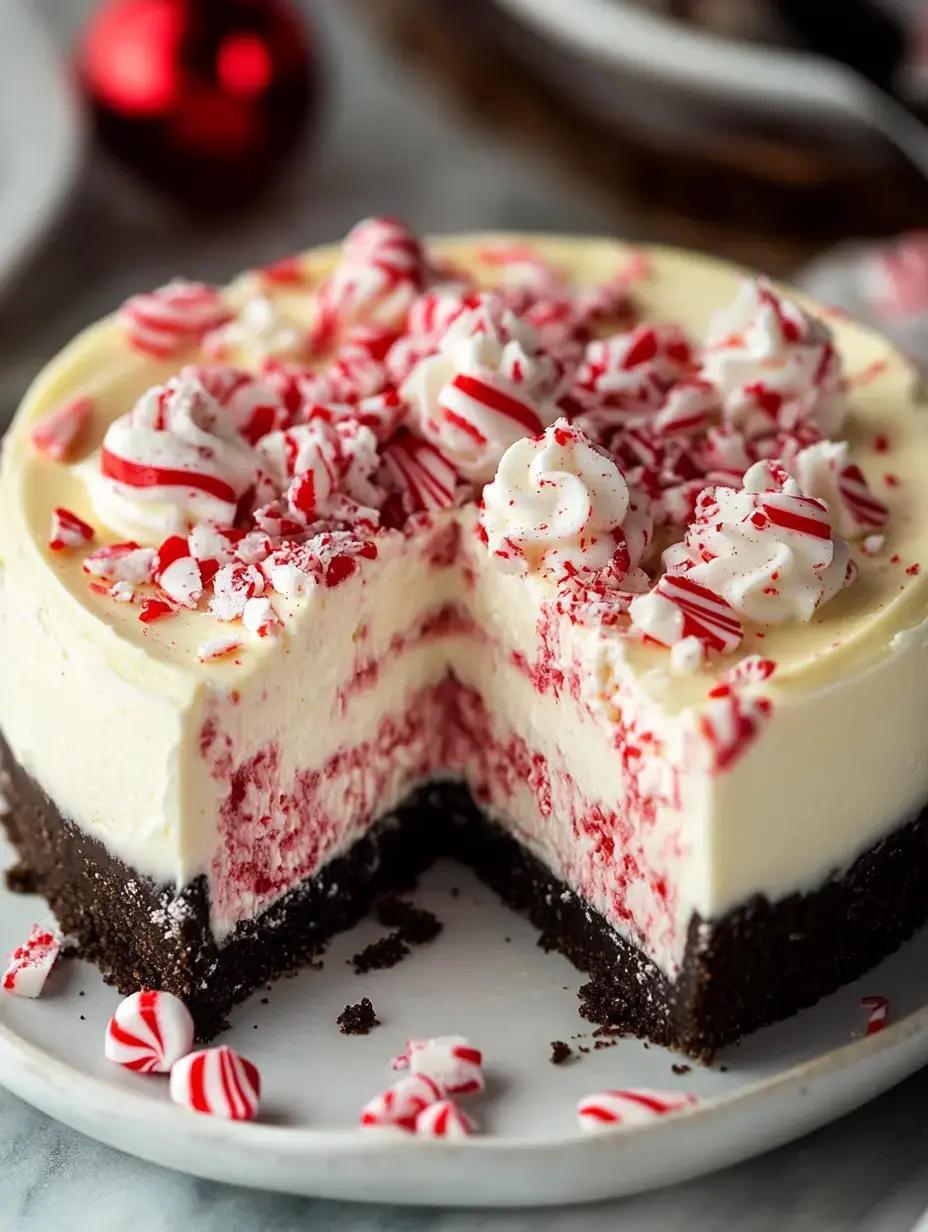
Your filling should end up perfectly smooth with just a hint of mint flavor and surprising bits of chocolate and candy throughout.
 Pin it
Water Bath Success Guaranteed
After one awful memory where water got into my crust (yes, I almost cried), I've nailed the water bath method:
- Pan Safety: I count on my trusty leakproof springform, but I still take extra steps.
- Tight Wrapping: One big piece of heavy-duty foil, wrapped carefully with no bottom openings.
- Extra Safety: I set my wrapped pan inside a bigger cake pan before putting in the water - better safe than sorry!
The Fluffy Layer That Amazes
The white chocolate mint mousse on top turns this from just tasty to absolutely mind-blowing! The key is getting your white chocolate mixture just the right coolness before you mix in whipped cream. If it's too hot, your cream melts; too cold and you'll see lumps. I touch it against my wrist - it should feel barely warm, kind of like checking baby milk!
Making Those Fancy Red Stripes
Those candy cane swirls are what I love most! I've noticed that gel food coloring works way better than the liquid kind for making stripes in the piping bag. Just a few red lines down the bag sides work great - too much red can make your cream taste weird. My little girl calls this part 'candy cane art time'!
Extra Holiday Touches
Let me tell you my top decorating secrets:
- Keep the best-looking candy pieces for decorating the top - looks count!
- For those nice chocolate curls, warm the chocolate bar in your hands first.
- I do a simple three-ring design that looks fancy but anyone can pull off.
 Pin it
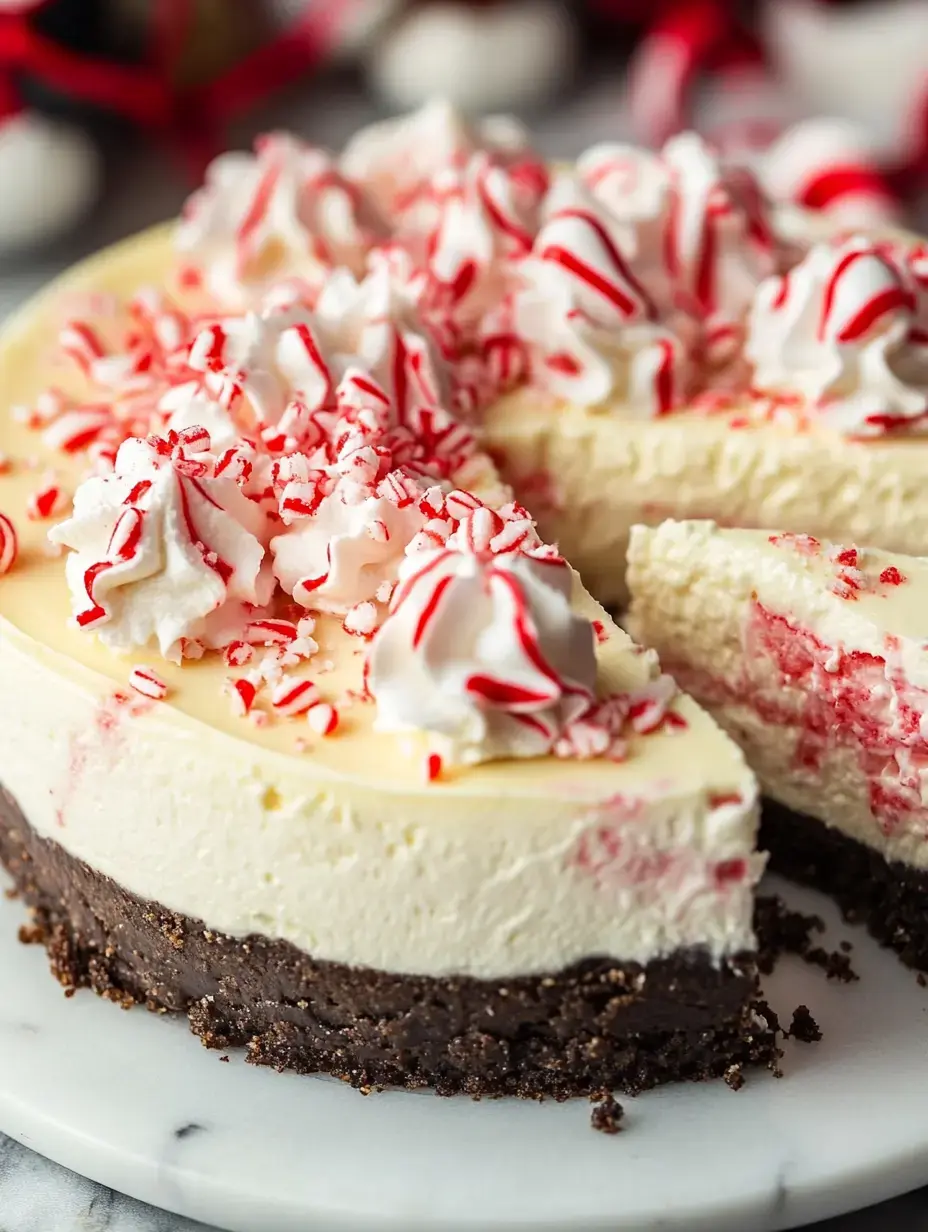
The Ultimate Party Dessert
Whenever I bring this cheesecake to holiday parties, people can't wait to try it! It's become such a tradition that my nephew starts bugging me about it before Halloween. There's something special about how the smooth cheesecake, cool mint flavor, and crunchy candy bits mix together.
Two Treats In One
I put my two favorite Christmas desserts together for an amazing result. The difference between the silky cheesecake and brittle candy canes, plus how the white chocolate and mint flavors play together, makes everyone speechless after their first taste!
What Makes This Base Better
The foundation of this dessert is worth talking about. While normal chocolate cookie bases work fine, this Oreo crust adds another flavor dimension that works perfectly with the sweet filling. Last Christmas, I caught my sister's husband sneaking just pieces of crust - that's how tasty it is!
 Pin it
Tricks From My Experience
- Warm Ingredients Work: I leave everything out overnight - room temp stuff mixes so much better!
- Slow Cooking Works: Gentle, long baking stops cracks every time.
- Smart Cooling Trick: I stick a wooden spoon in the oven door for the perfect slow cooldown.
Decorating Made Simple
Don't worry about those red stripes - they're way easier than they seem! I use a tiny clean paintbrush to put red gel color inside my piping bag. Your first few squeezes might look pinkish, but soon you'll get those perfect red and white stripes. It's basically food art that anyone can do!
Keeping It Fresh
- Better Next Day: This cheesecake actually tastes better after chilling overnight!
- Make Ahead: I often bake an extra one to freeze for surprise visitors.
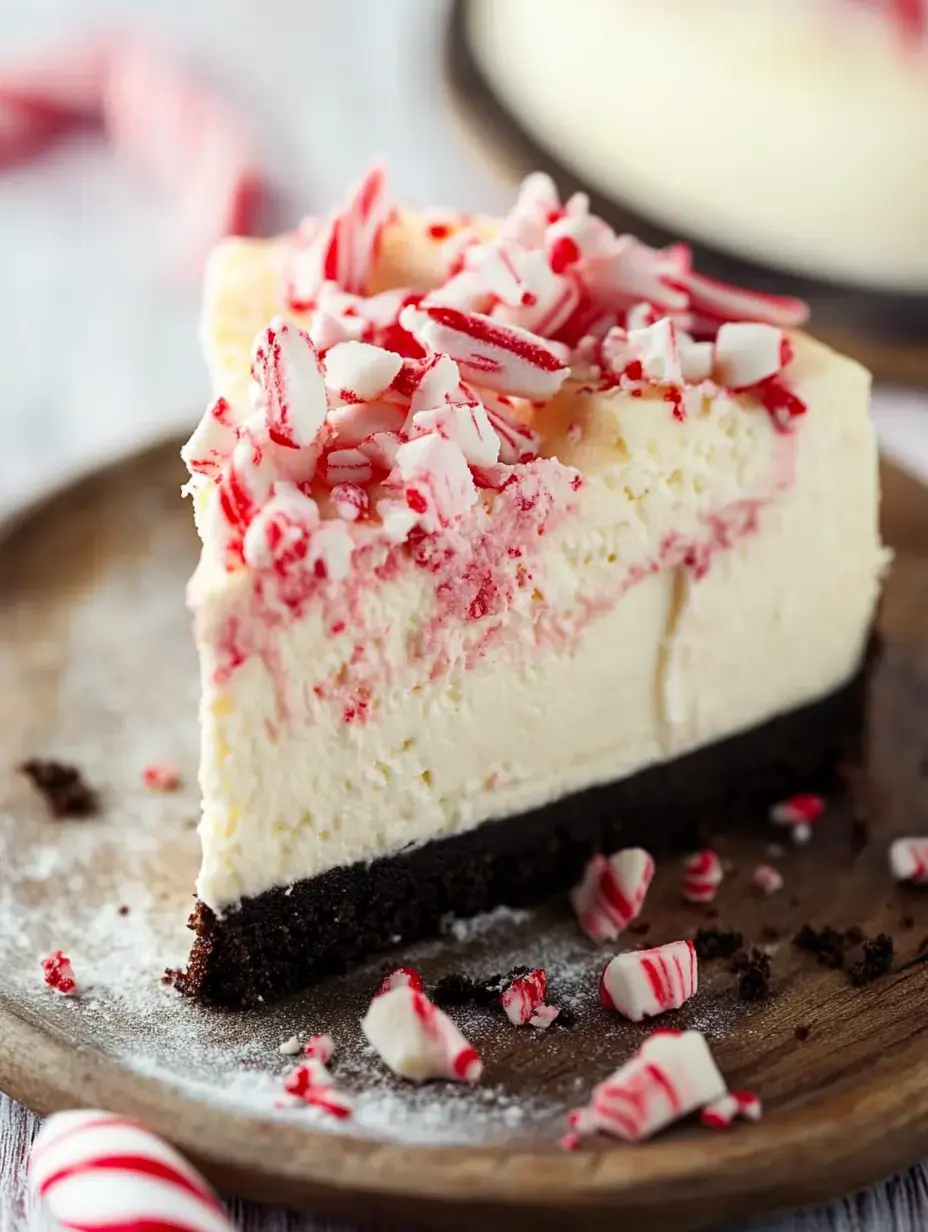
- Clean Cutting: Warm your knife in hot water between slices for magazine-worthy pieces.
Change It Up
- Go Darker: Try a layer of dark chocolate ganache in the middle - it's amazing!
- No Gluten Needed: Gluten-free sandwich cookies make a great crust option.
- Chocolate Fans: I sometimes add dark chocolate drizzle on top for extra richness.
Never Disappoints
Something about this cheesecake brings folks together! Maybe it's how it combines Christmas flavors in a new way, or maybe it's just that perfect mix of smooth and crunchy textures. Whatever the reason, it always makes get-togethers feel more special.
 Pin it
Gift It Gladly
Wanna make someone smile? This cheesecake makes the best present ever! I've started giving single slices in cute boxes to friends and neighbors. You can include the instructions if you're feeling generous - or keep it as your secret holiday specialty, I won't tell!
Festive Memories
This isn't just food - it's part of our family Christmas story now. From smashing candy canes with the kids to watching everyone's faces light up when it comes to the table, it's become one of our favorite holiday activities. I bet it'll become part of your family traditions too!
Frequently Asked Questions
- → How many days can this be stored?
- Keep it chilled for 3–4 days, but the colors look best on the first day to avoid bleeding.
- → Why is a water bath necessary?
- It keeps cracks away and ensures even cooking. Make sure the pan is tightly secured so no water leaks in.
- → Can parts of this be made earlier?
- You can prepare the cake early, but save the decorative touches for right before serving.
- → Why cool it slowly in the oven?
- It avoids cracks on top by letting the cheesecake adjust to the temperature gradually.
- → How do I get striped whipped cream?
- Brush red food dye onto the inside of your piping bag before filling it with whipped cream for a candy cane finish.