
 Pin it
Whipping up yogurt in the oven turns basic morning ingredients into a protein-loaded delight with a texture just like custard. This handy dish packs 8 grams of protein in each serving and needs hardly any prep work or fancy stuff. Great for mornings, afternoon munchies, or a light sweet ending, it gives you a healthy twist on normal baked stuff while still hitting that sweet spot you crave.
I first tried making baked yogurt when I was bored with my usual high-protein breakfast choices. After my first try came out a bit wobbly, my second shot nailed that smooth, firm texture that reminded me of custard but packed way more nutrition. Now I make it every week during my meal prep, so I've always got a protein-rich snack waiting in the fridge.
Key Components
- Greek yogurt: The main protein source that builds our custardy foundation (2% works nicely)
- Fresh berries: Add natural sweetness, bright colors, and good-for-you benefits
- Eggs: Help everything stick together while boosting protein content
- Maple syrup: Brings natural sweetness that works well with tangy yogurt
- Cornstarch: Gives you that perfect firmness that makes yogurt feel like custard
- Vanilla extract: Adds warm background flavor
Cooking Instructions
- Get Your Dish Ready:
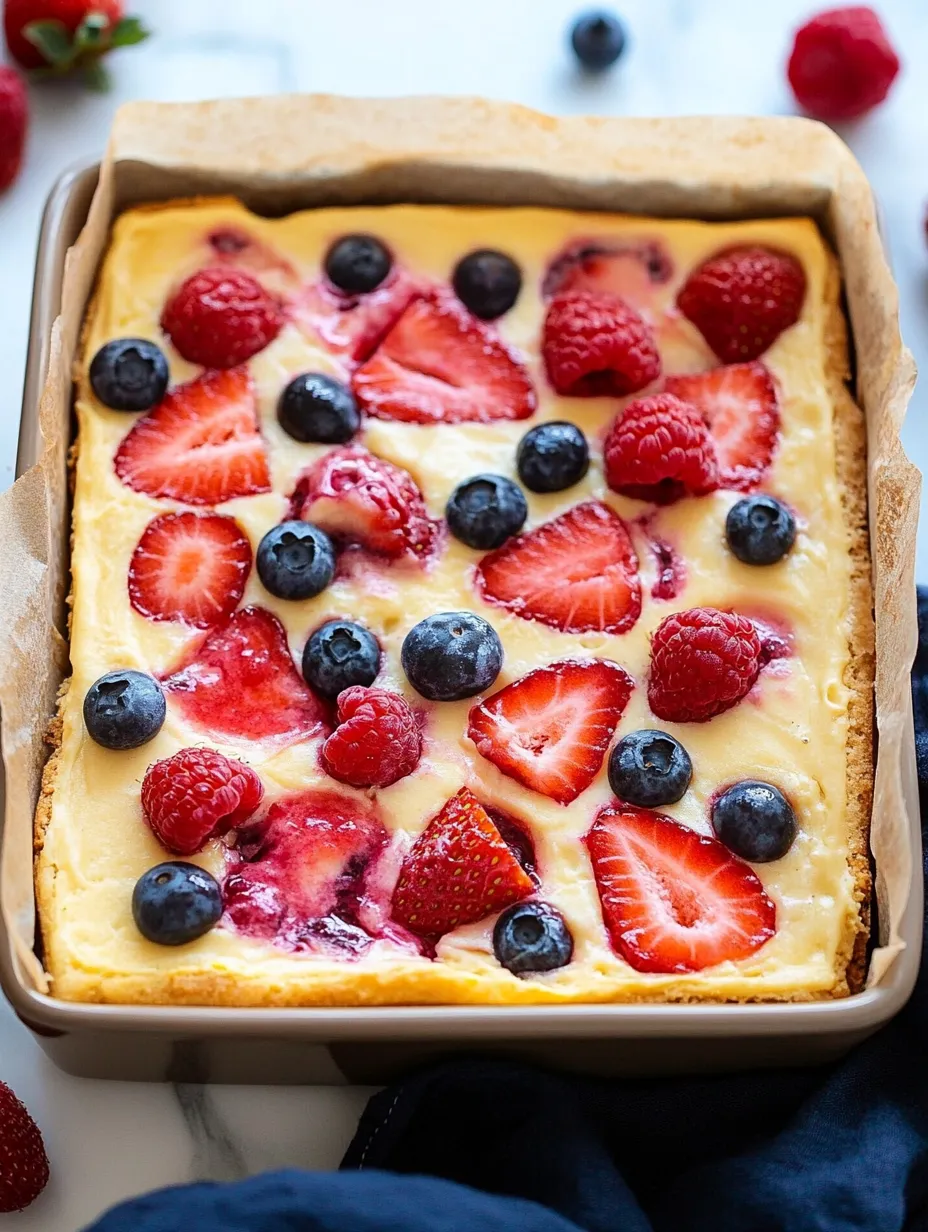
- Start by warming your oven to 350°F (175°C) so it's hot enough when your mix is ready. Put parchment paper in an 8×8 inch baking dish, letting some hang over the edges so you can lift it out later. The paper stops sticking and makes cleanup way easier.
- Mix Your Yogurt Blend:
- Grab a big mixing bowl and mix 2 cups of Greek yogurt, 3 large eggs, 1/4 cup maple syrup, and 1 teaspoon vanilla extract. Stir until everything looks smooth and the eggs aren't visible anymore. Then add 2 tablespoons of cornstarch and keep mixing till all lumps are gone. You need the cornstarch to get that nice custard feel.
- Mix In Your Fruit:
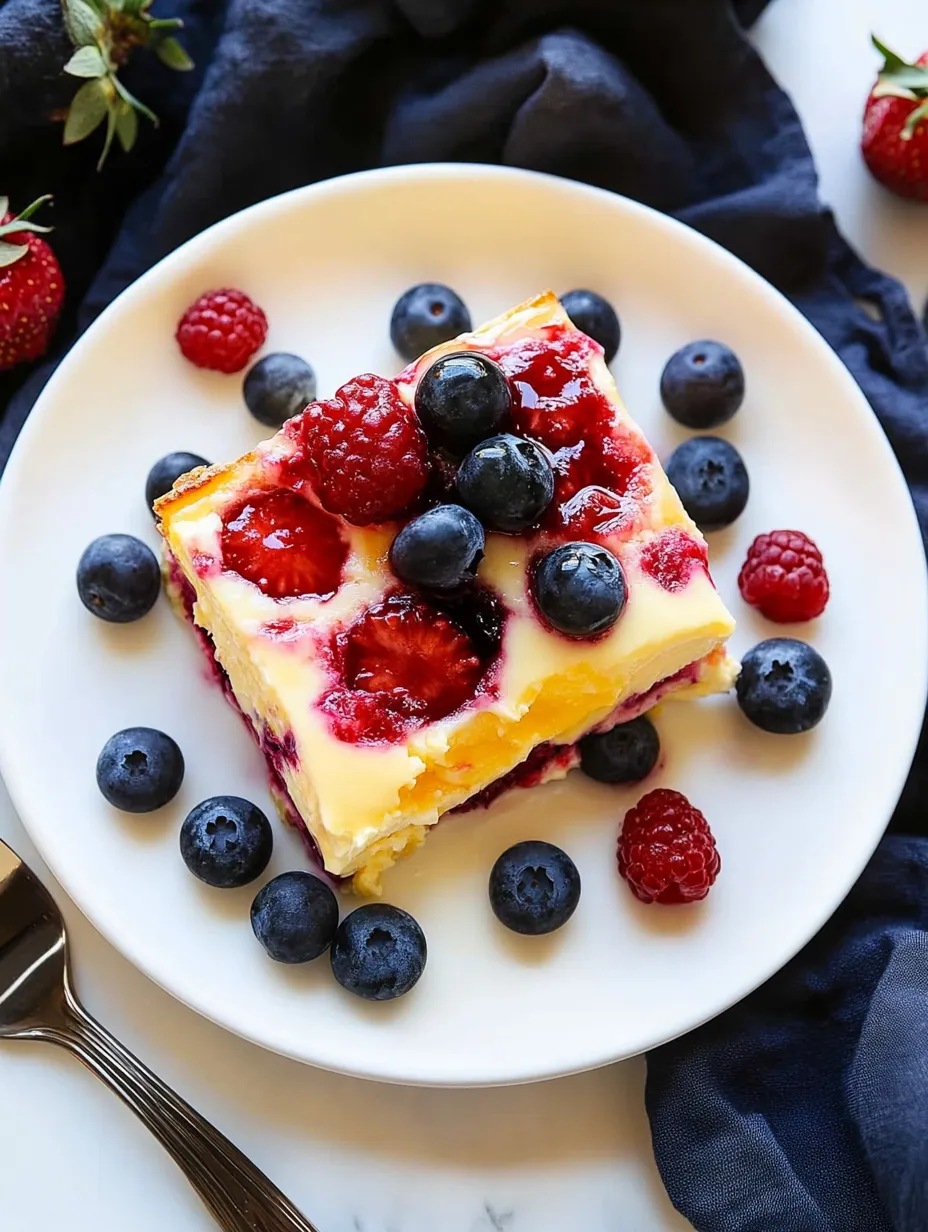
- Carefully stir 1 cup of mixed berries into your yogurt mix without smashing them. Pour everything into your papered dish, making sure it's spread out evenly. Scatter the other 1/2 cup of berries on top, spacing them out. This gives you pretty color spots and berry taste throughout.
- Cook It Just Right:
- Stick the dish in your hot oven and let it cook about 45 minutes. You'll know it's done when the middle looks firm and doesn't wiggle when you gently shake the dish. Let it cool almost completely before cutting into 9 equal squares, since it keeps firming up as it cools.
My kitchen tests taught me you can't rush this recipe. The first time I made it, I didn't let it cool enough and ended up with tasty but sloppy results. When I took the extra time to let it cool all the way, I got perfect squares that held their shape from fridge to plate. Sometimes the easy lessons make the biggest impact.
Ways To Enjoy It
- Have it cold for a cool summer breakfast or snack.
- Heat it up a bit in winter months for something cozy.
- Eat it alongside whole grain toast or a healthy muffin for a full breakfast.
- Serve it as a lighter after-dinner treat with a tiny bit of whipped cream on top.
 Pin it
Keeping It Fresh
- Keep your cut pieces in a sealed container in the fridge up to 5 days, which makes weekly food prep a breeze.
- For keeping longer, freeze separate pieces up to 3 months in containers that won't let air in.
- Let frozen pieces thaw overnight in your fridge or for a few hours on the counter before eating.
Tasty Twists
- Island Style: Use diced mango and pineapple instead of berries, then sprinkle coconut on top.
- Apple Cinnamon: Switch berries for diced apples mixed with cinnamon, maybe add some chopped walnuts.
- Chocolate Chunk: Mix in small dark chocolate bits instead of fruit for a sweeter treat.
- Lemon Blueberry: Mix lemon zest into your yogurt blend and use just blueberries for a winning combo.
Diet-Friendly Changes
- Sugar-Free: Skip the maple syrup for a more sour result, or try a sugar-free maple alternative.
- Dairy-Free: Use plant-based Greek-style yogurt, though you'll get less protein.
- Other Thickeners: Swap cornstarch for the same amount of arrowroot or tapioca flour.
 Pin it
I've made this baked yogurt every week for months and it always hits the spot. What makes it really stand out is how flexible it is—works great as a protein-packed breakfast, a filling snack, or a lighter dessert option. The mix of creamy texture, natural sweetness, and nutritional perks makes something that feels like a treat while still being good for you—really giving you the best of both worlds.
Frequently Asked Questions
- → Can I swap Greek yogurt for regular yogurt?
- Sure, but it won't be as firm. Greek yogurt has less moisture, which helps the bake set. If using regular yogurt, drain it a bit or add more cornstarch.
- → What fruits work besides berries?
- Try peaches, apples, bananas, or pears. Just keep them from being overly juicy so they don’t mess with the texture.
- → What can I use instead of cornstarch?
- Go for arrowroot, tapioca, or potato starch—any of these can replace cornstarch in the same amount to thicken the mix.
- → Can I use plant-based yogurt?
- Yes! Coconut or almond yogurt works well, but stick to a thick, Greek-style dairy-free option for the best result.
- → How do I know when it’s baked?
- When the center is steady and doesn’t wobble when you jiggle the pan. The edges may turn a little golden, but avoid over-baking to keep it soft.